uNavbar 1.0.4
See the version list below for details.
dotnet add package uNavbar --version 1.0.4
NuGet\Install-Package uNavbar -Version 1.0.4
<PackageReference Include="uNavbar" Version="1.0.4" />
<PackageVersion Include="uNavbar" Version="1.0.4" />
<PackageReference Include="uNavbar" />
paket add uNavbar --version 1.0.4
#r "nuget: uNavbar, 1.0.4"
#:package uNavbar@1.0.4
#addin nuget:?package=uNavbar&version=1.0.4
#tool nuget:?package=uNavbar&version=1.0.4
uNavbar
A commercial-grade navigation package for Umbraco 17+.
Features
- Dynamic Navigation: Manage your site's main menu via the "Site Settings" node.
- Branding Control: Upload a logo and set your brand name directly from the backoffice.
- Responsive: Includes a lightweight, dependency-free responsive navbar.
- Performance Optimized: Uses efficient queries to ensure zero impact on site speed.
Installation
- Install the package via NuGet.
- Build and run your Umbraco site (ensure a valid
umbracoDbDSNconnection string is configured). - On first startup, the migration will create the
Site Settingsdocument type and also add aSite Settingsnode at the content root. - If, for any reason, the
Site Settingsnode is not visible under Content, simply right‑click the root of the content tree, choose Create, and select Site Settings to create it manually. - Go to the
Site Settingsnode and configure your links and branding.- Note: The
Header Logopicker is unfiltered by default to maximize compatibility (SVG, PNG, JPG, etc.). You can manually apply filters in the Umbraco backoffice underSettings > Data Types > uNav Logo Pickerif required.
- Note: The
Usage
After installing the package and building your project, the Navigation.cshtml partial view will be automatically copied to Views/Partials/Navigation.cshtml (if it doesn't already exist).
Include the partial view in your layout file using either option:
Option 1 - Standard location (recommended):
@await Html.PartialAsync("Navigation")
Option 2 - Full path:
@await Html.PartialAsync("~/App_Plugins/uNav.Common/content/Views/Partials/Navigation.cshtml")
Note: Files in App_Plugins/uNav.Common/ may appear as read-only (this is normal for NuGet package files). The copy in Views/Partials/Navigation.cshtml is writable and can be customized. If you customize it, the package will not overwrite your customizations on future updates.
CSS Customization
The navigation bar uses unav-* classes. You can override these in your own stylesheet or edit navbar-custom.css to match your brand colors.
Requirements
- Umbraco 17+
Content Delivery API Support
uNavbar is compatible with the Umbraco Content Delivery API. To consume your navigation and branding data via API, you must enable both the Content and Media Delivery APIs in your appsettings.json:
{
  "Umbraco": {
    "CMS": {
      "DeliveryApi": {
        "Enabled": true,
        "PublicAccess": true,
        "Media": {
          "Enabled": true,
          "PublicAccess": true
        }
      }
    }
  }
}
Once enabled, you can fetch the Site Settings data via the standard Umbraco Delivery API endpoints.
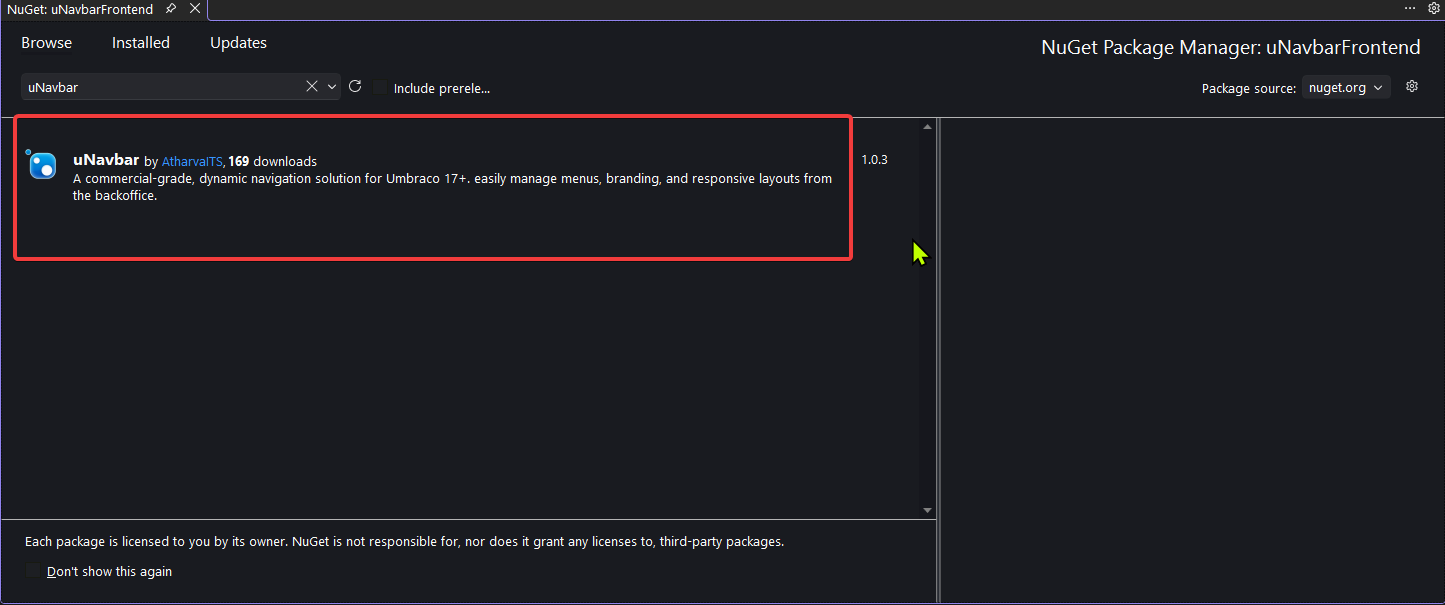
Step 1
Install the uNavbar NuGet package.
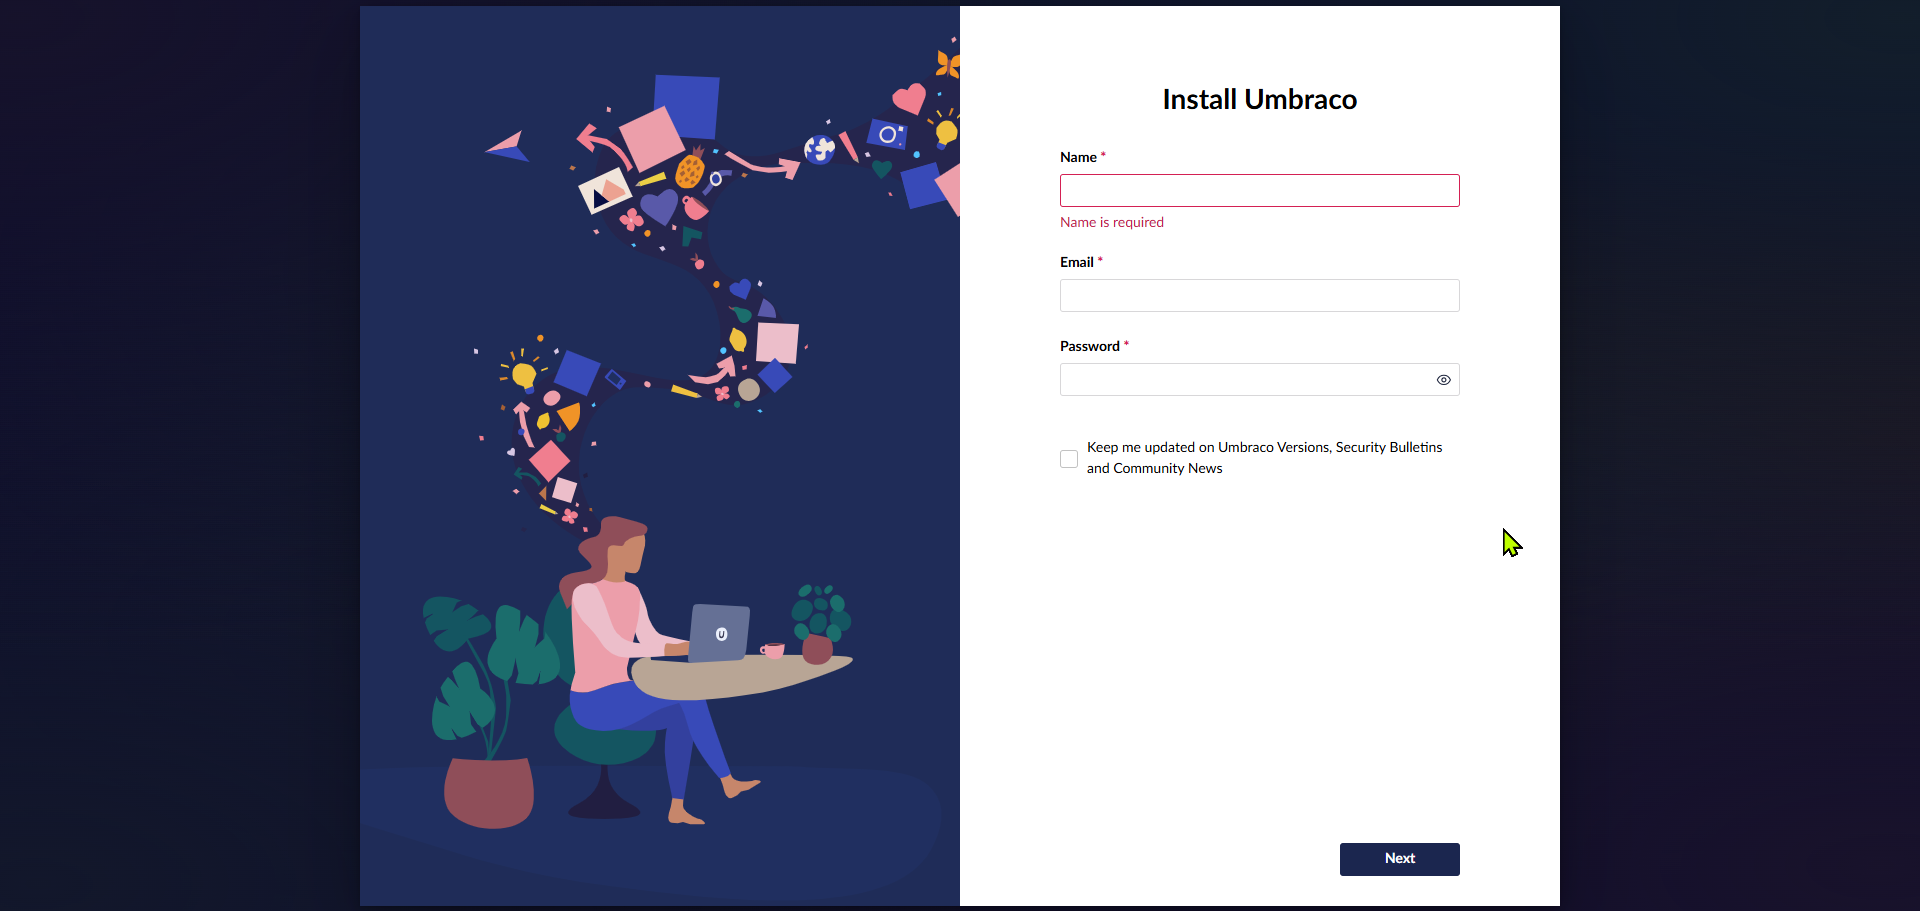
Step 2
Rebuild and run the solution, then configure Umbraco.
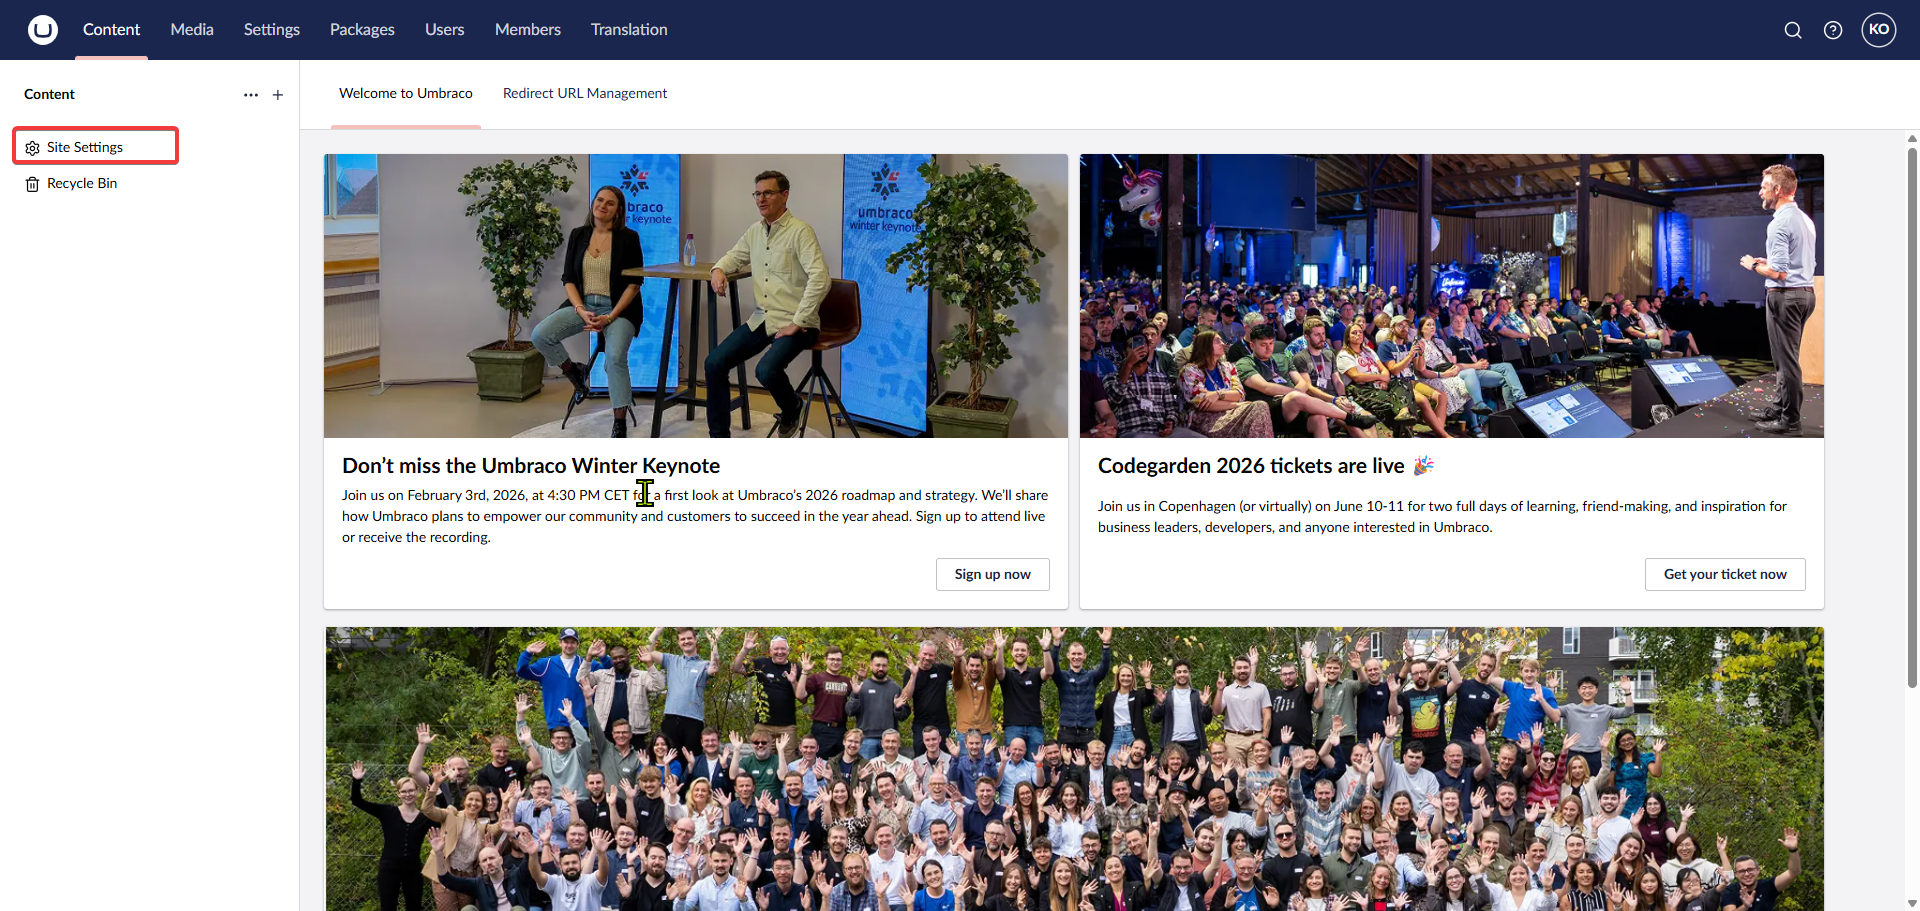
Step 3
Log in to the backoffice. The Site Settings content node should be automatically created.
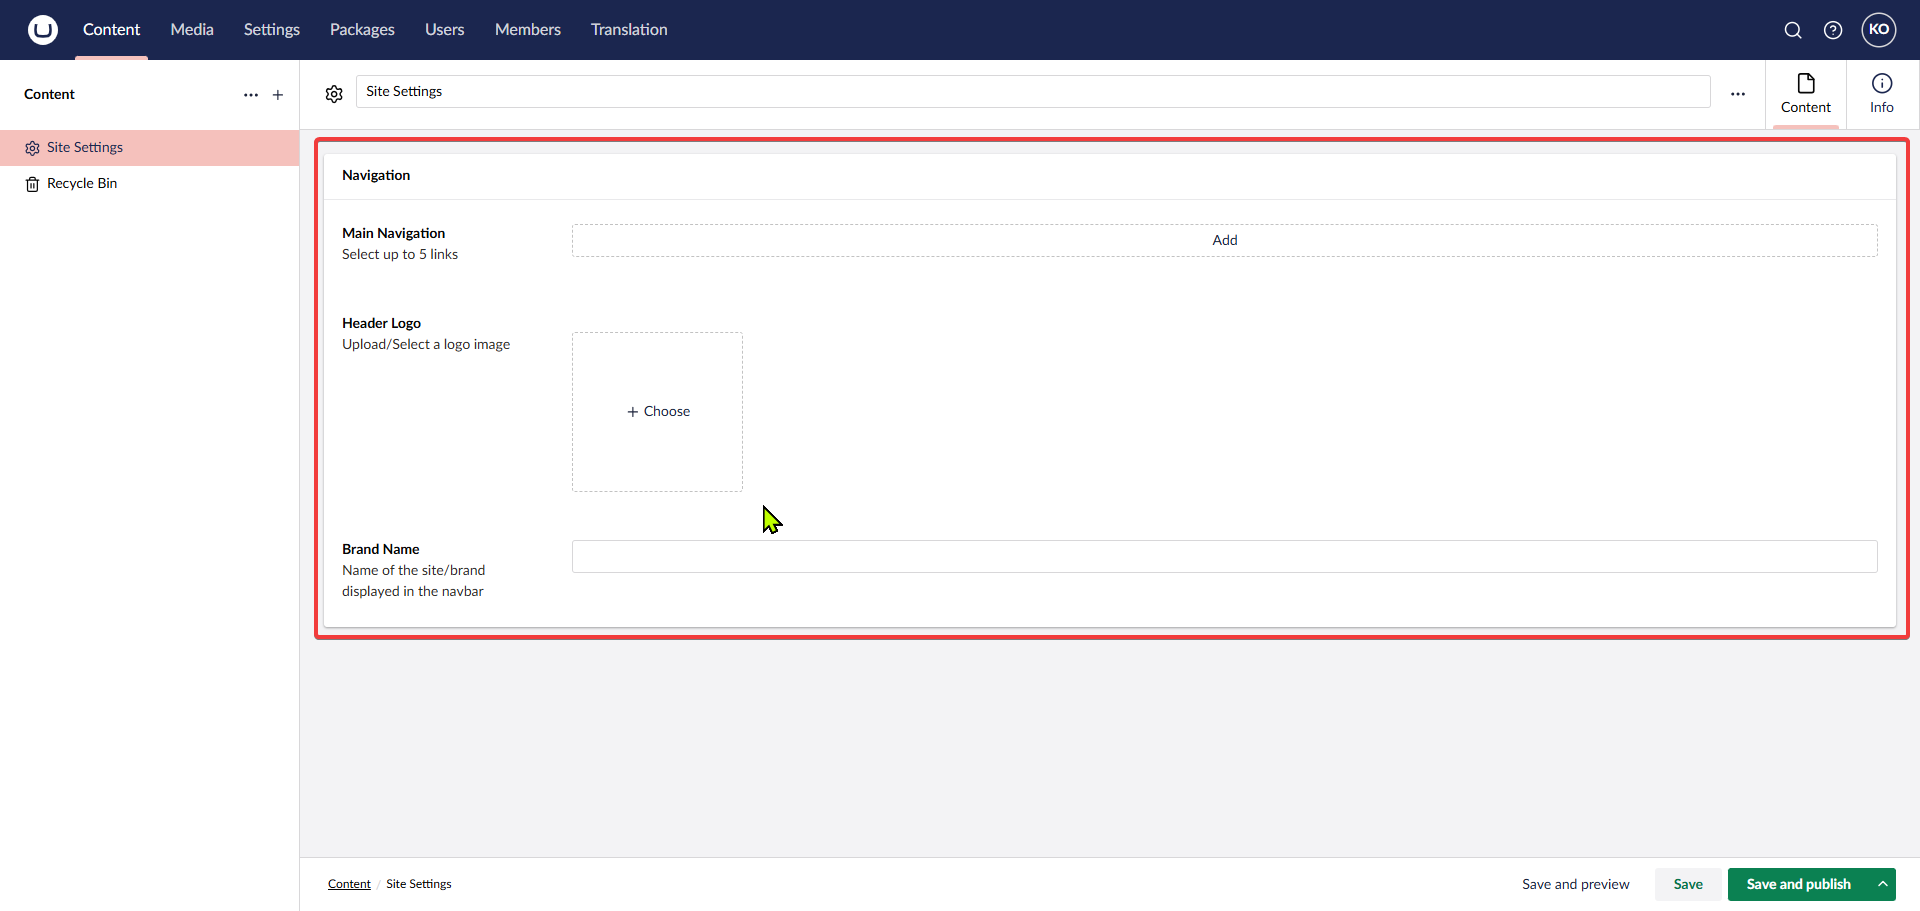
Step 4
The Site Settings document should appear with the following properties:
Step 5
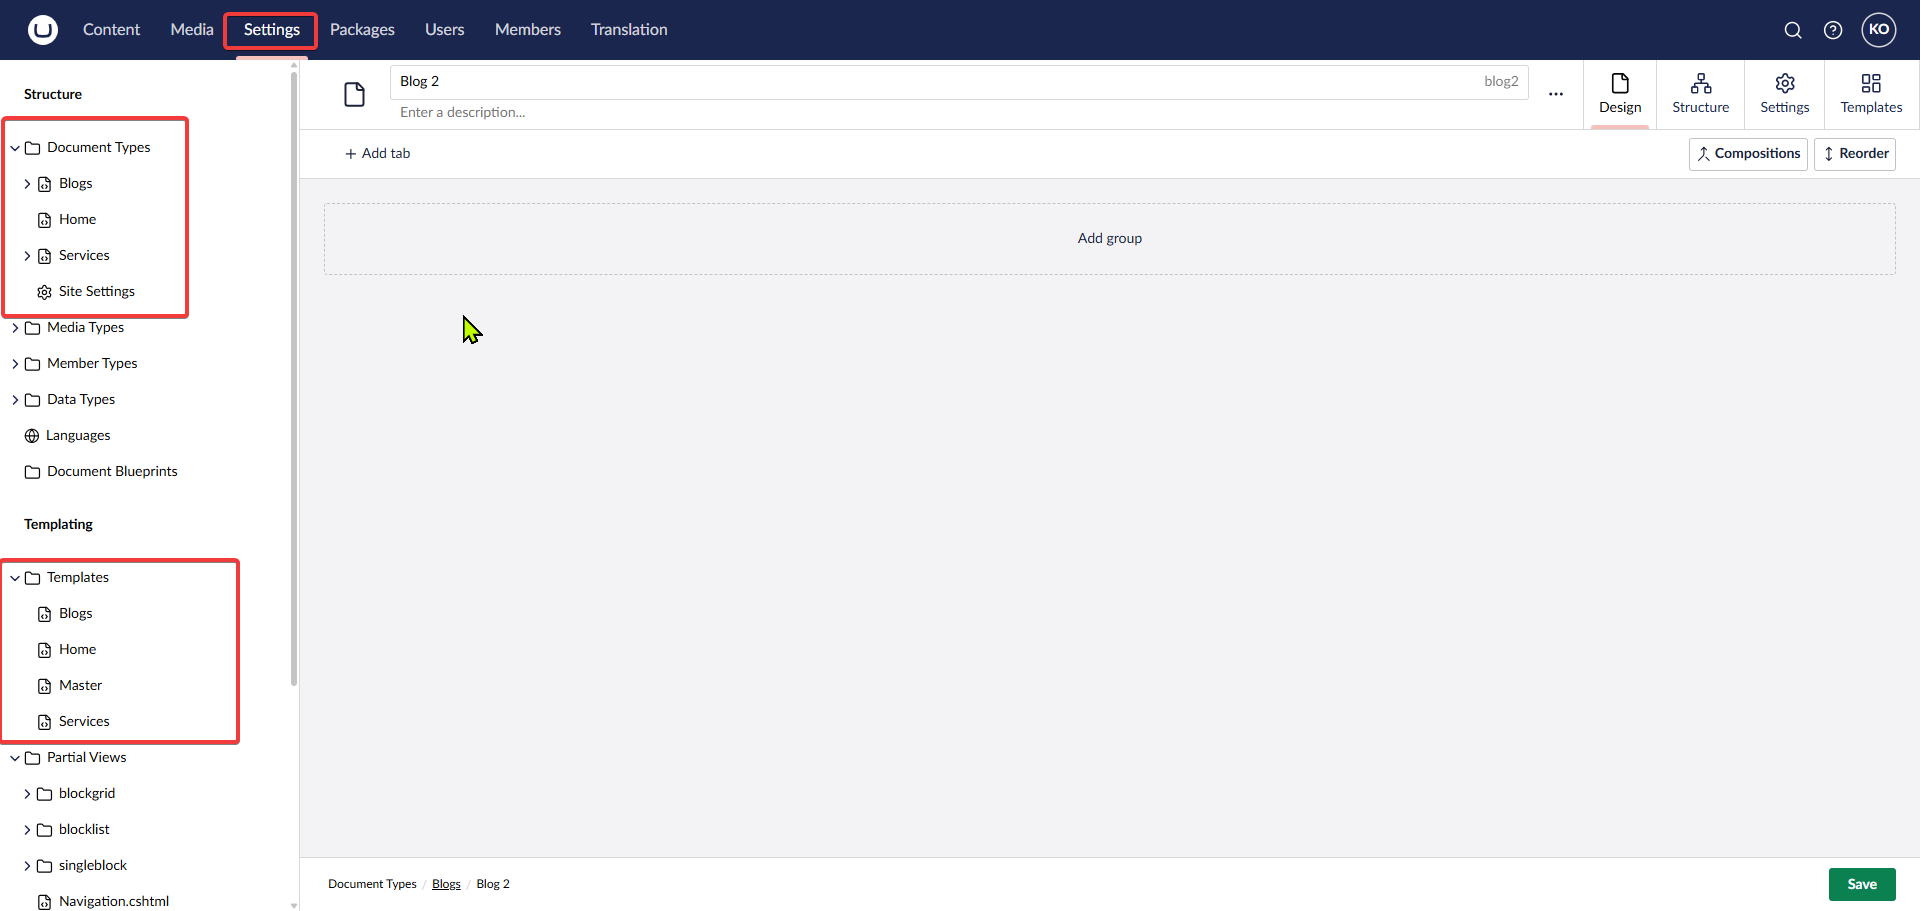
Add the relevant documents to show in the Navbar by following these steps:
Go to the Settings tab and create appropriate Document Types and Templates.
Step 6
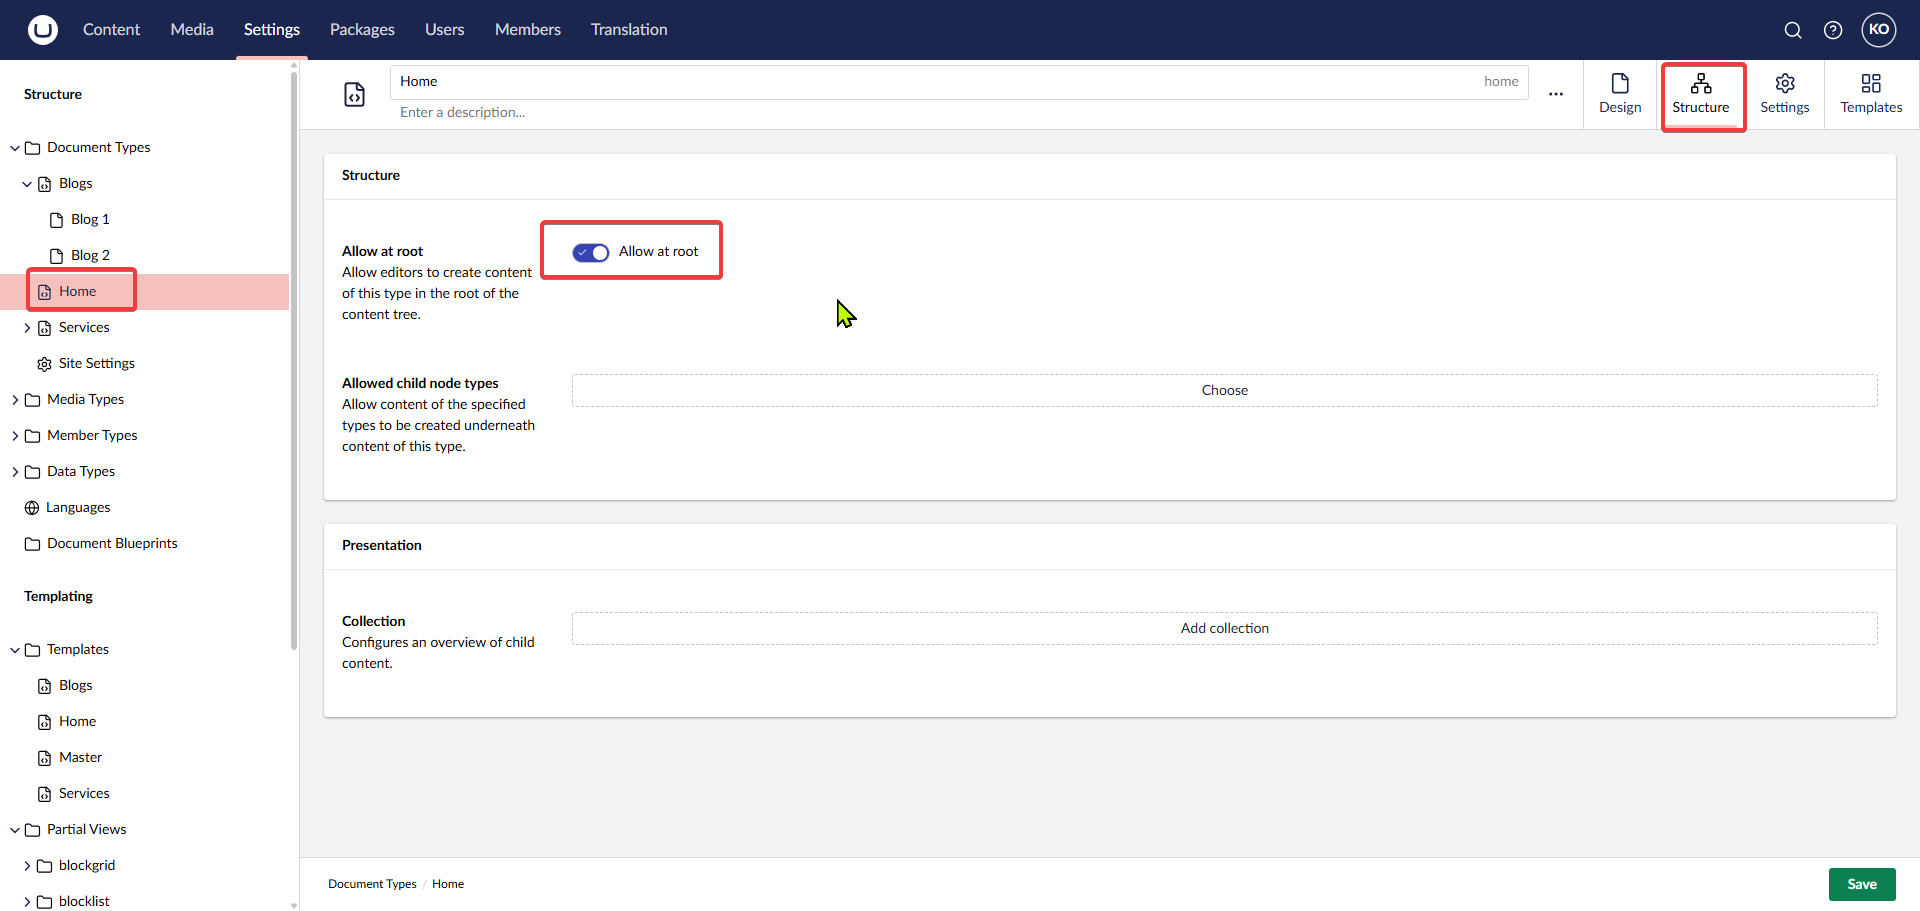
Ensure you toggle Allow as Root for the documents you want to show in the content section root.
Step 7
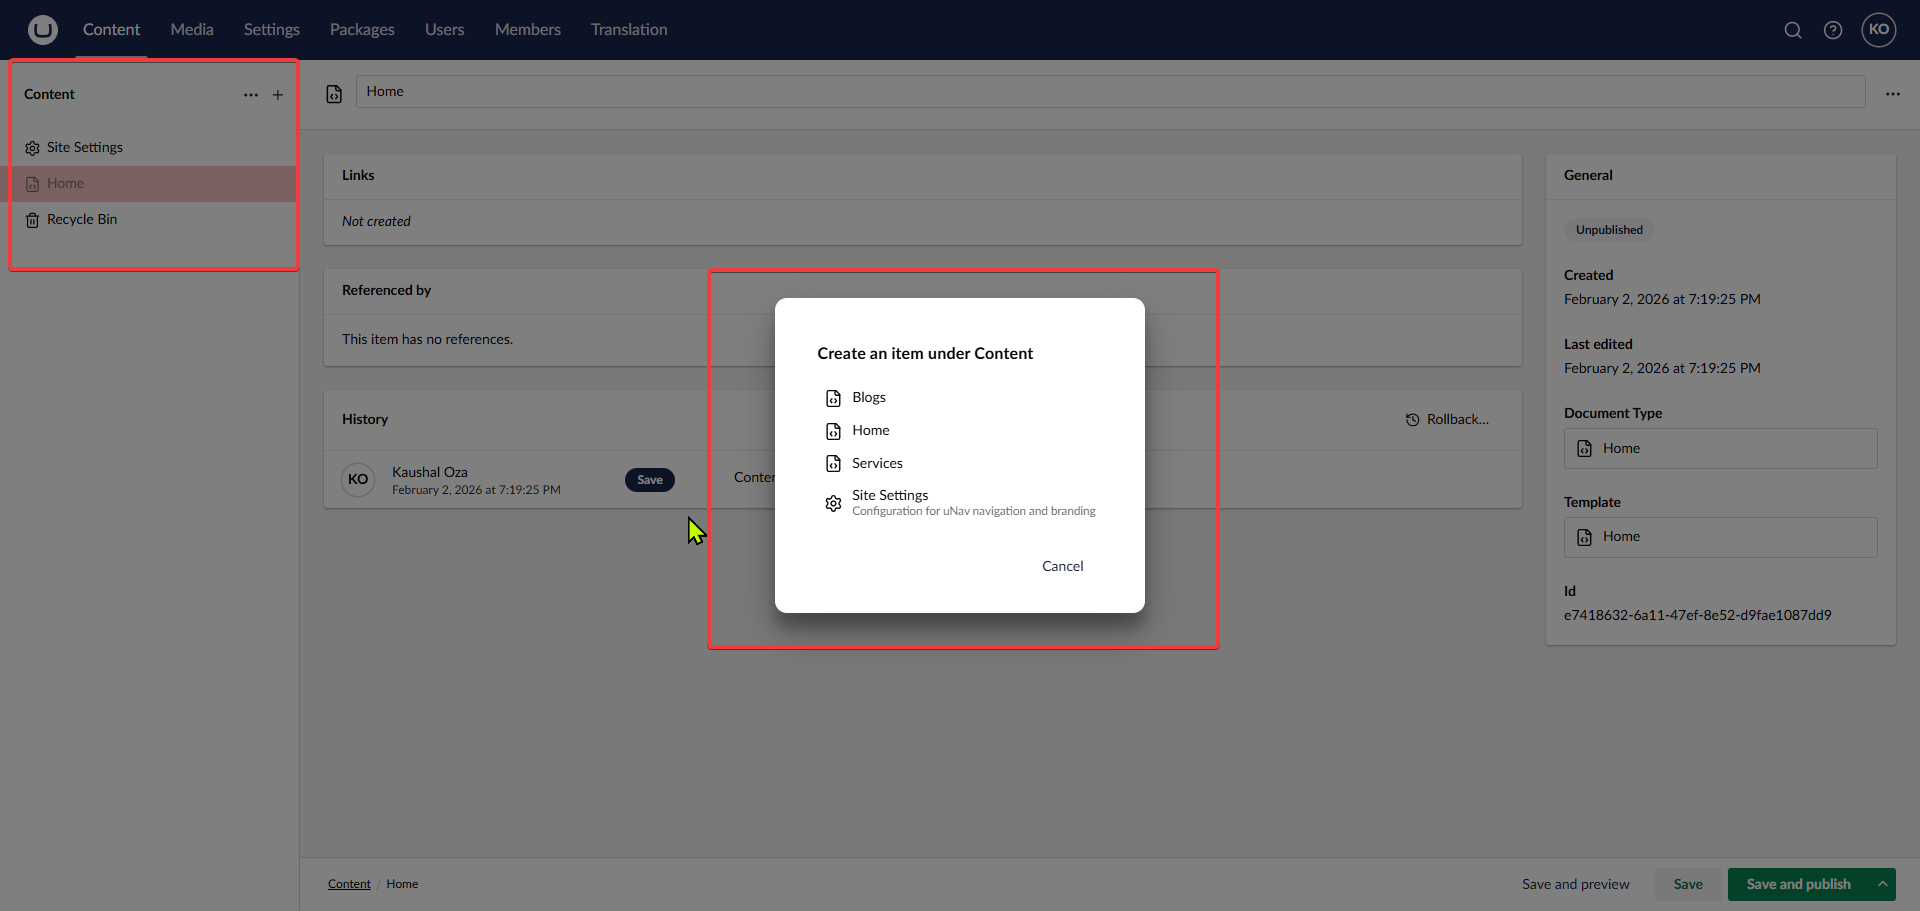
Register the documents inside the Content tab.
Step 8
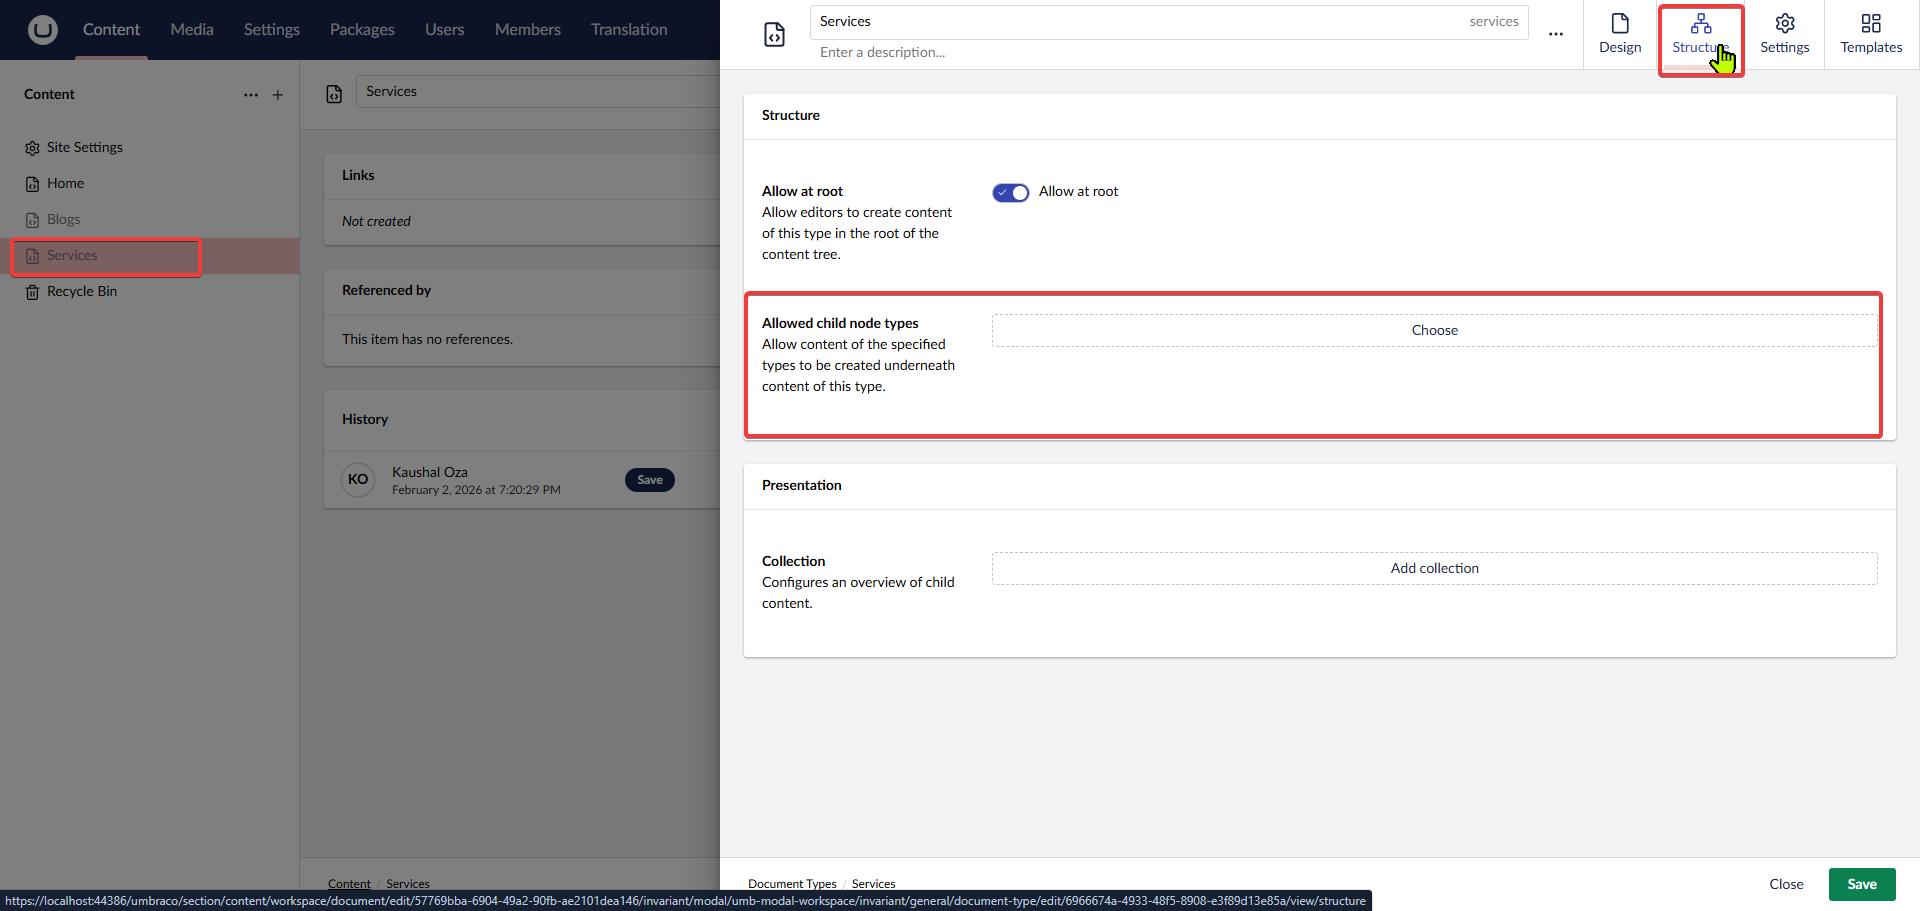
Add child document support to the root documents.
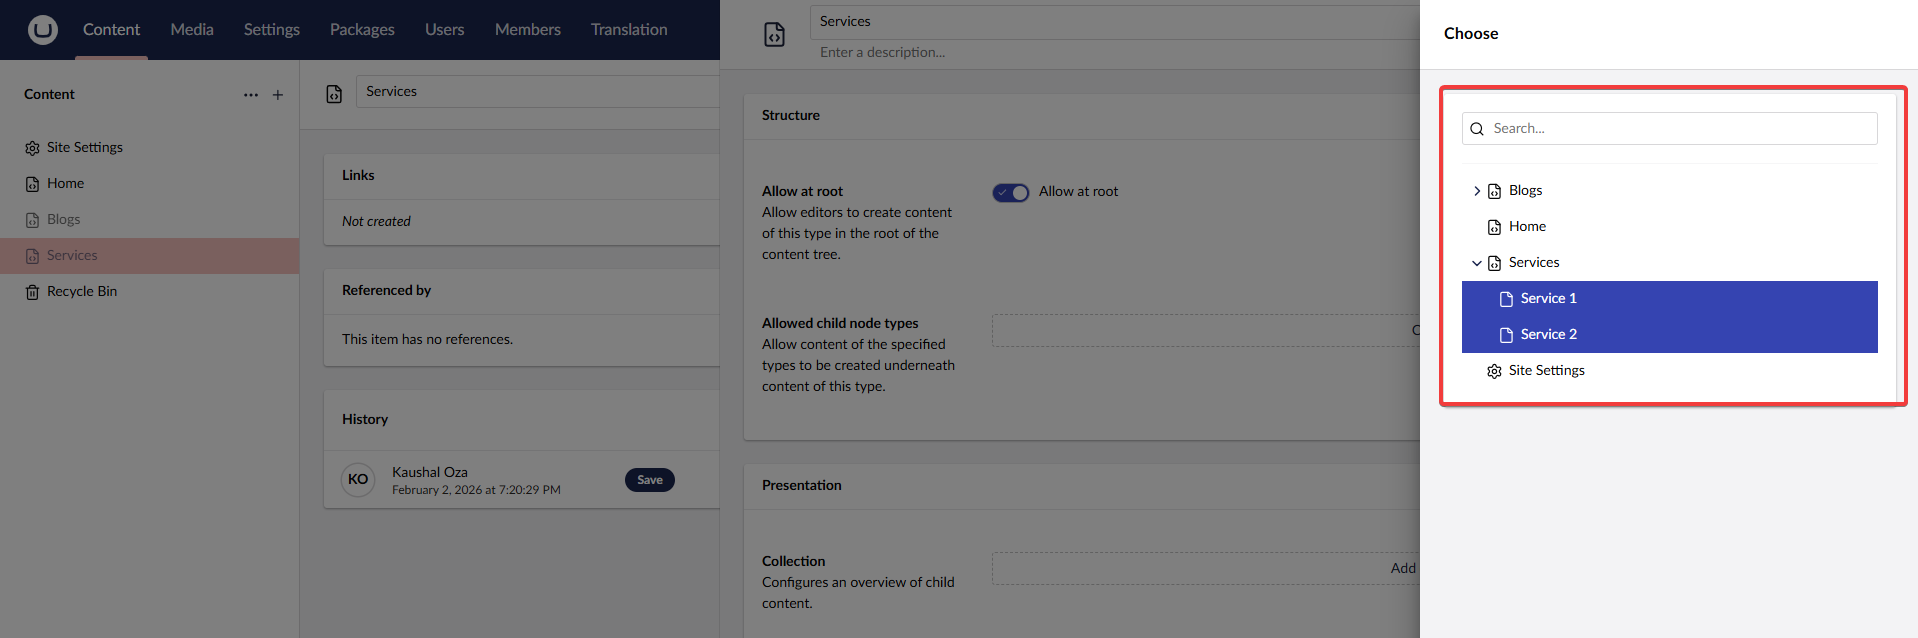
Step 9
Select the appropriate allowed child node types.
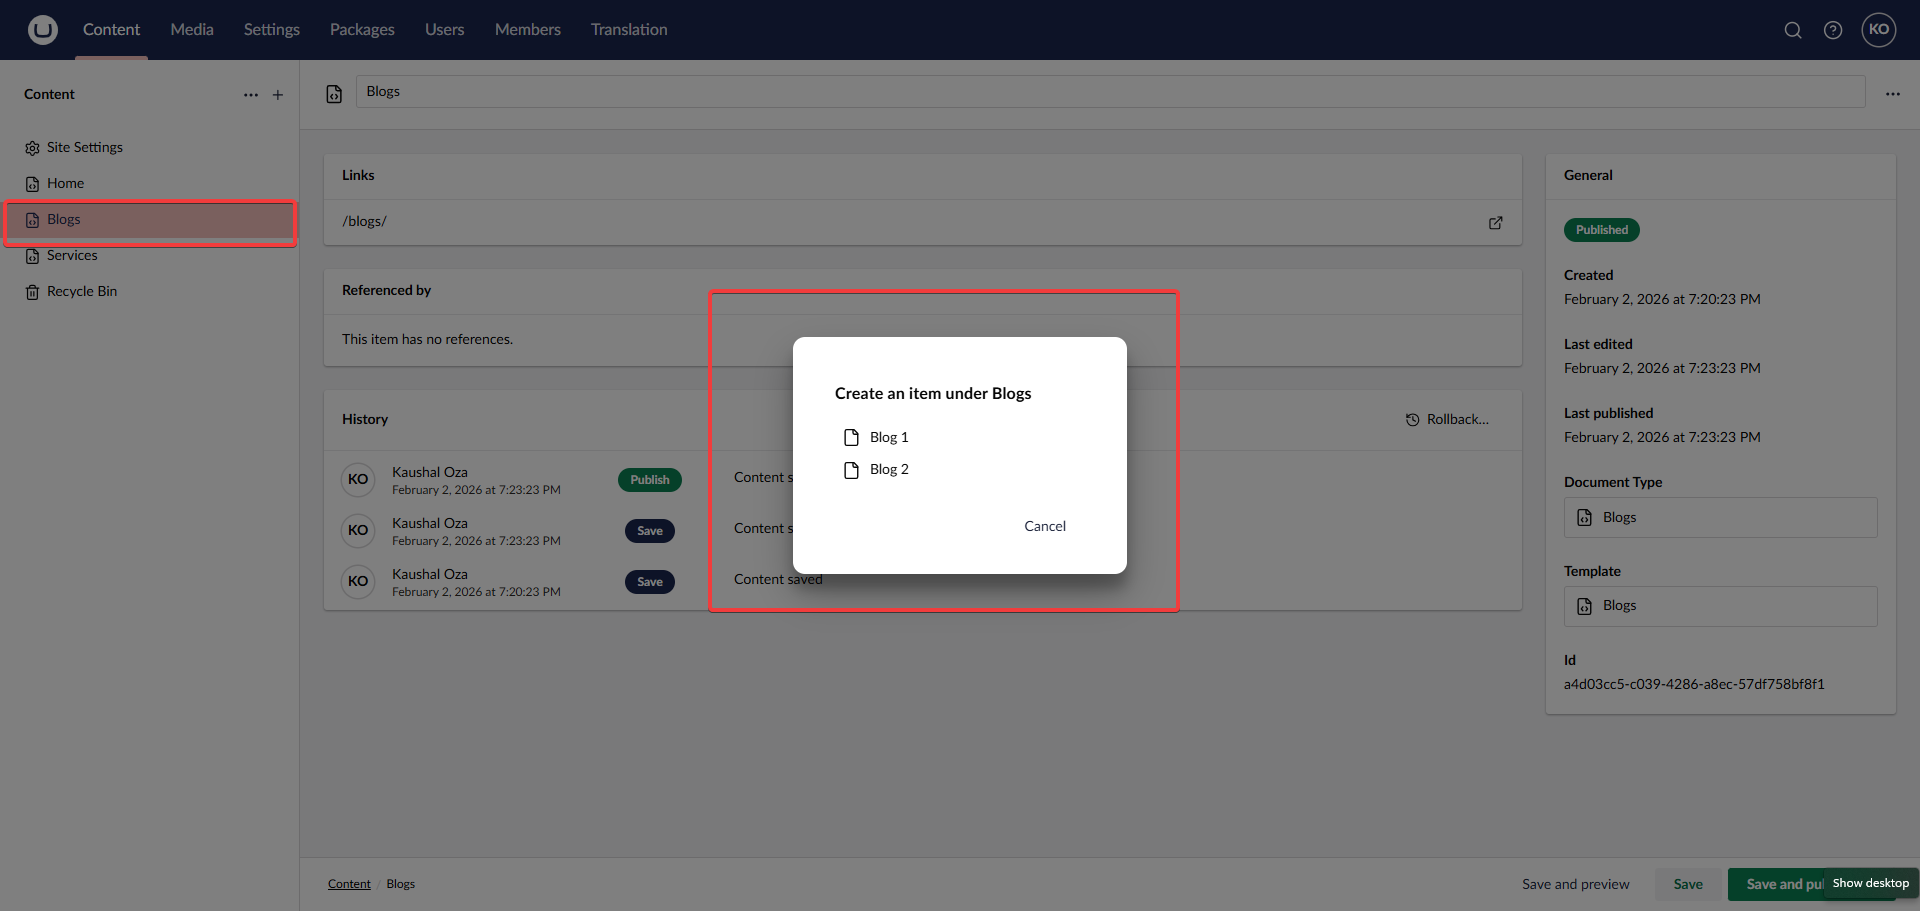
Step 10
Add child documents to the root documents.
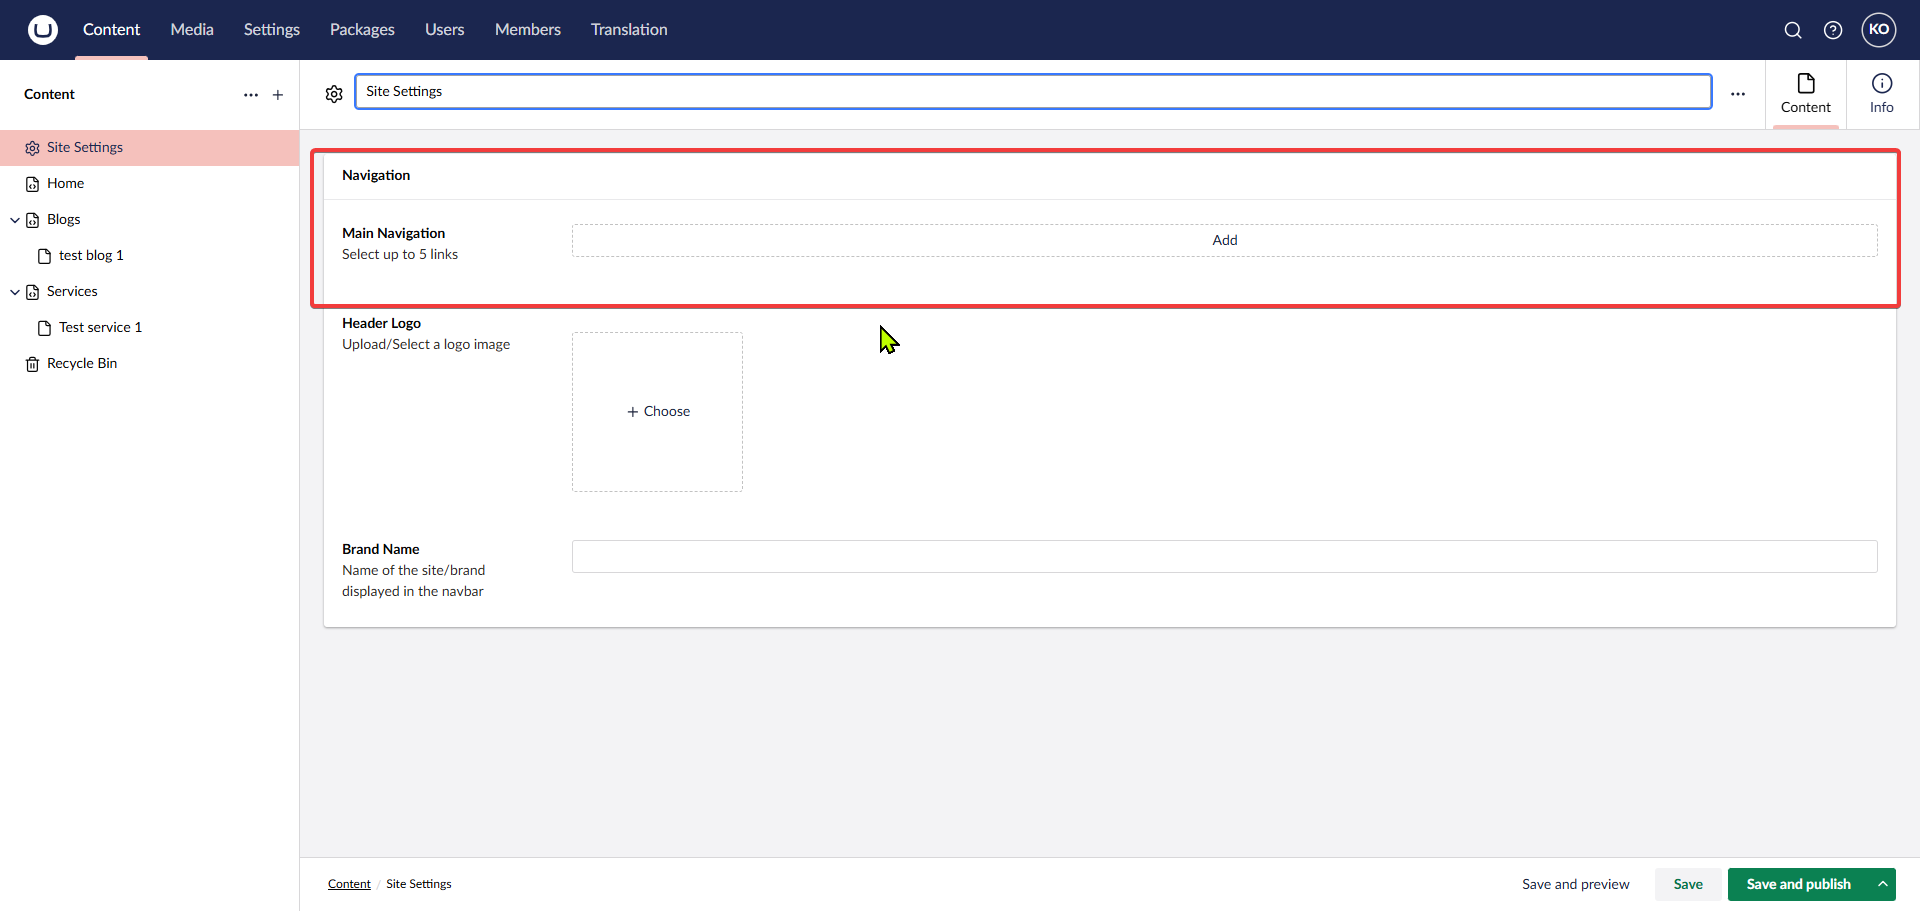
Step 11
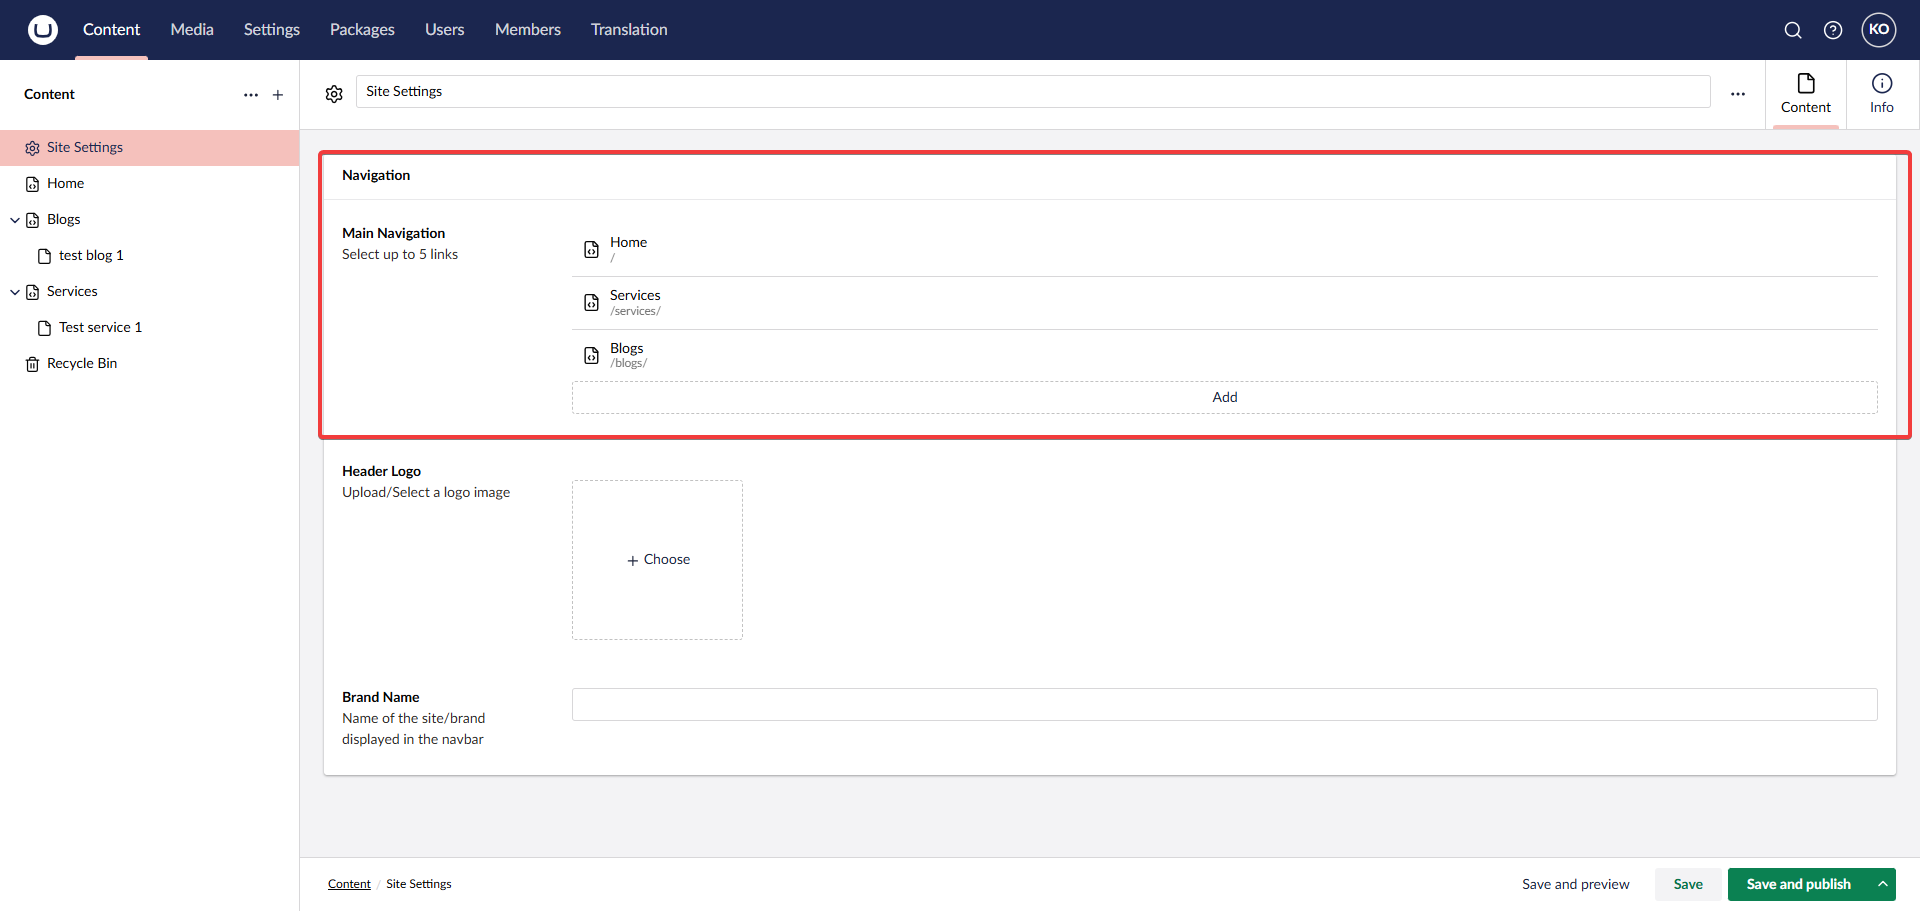
The structure should look like the image below. You can now configure the navigation bar menus.
Step 12
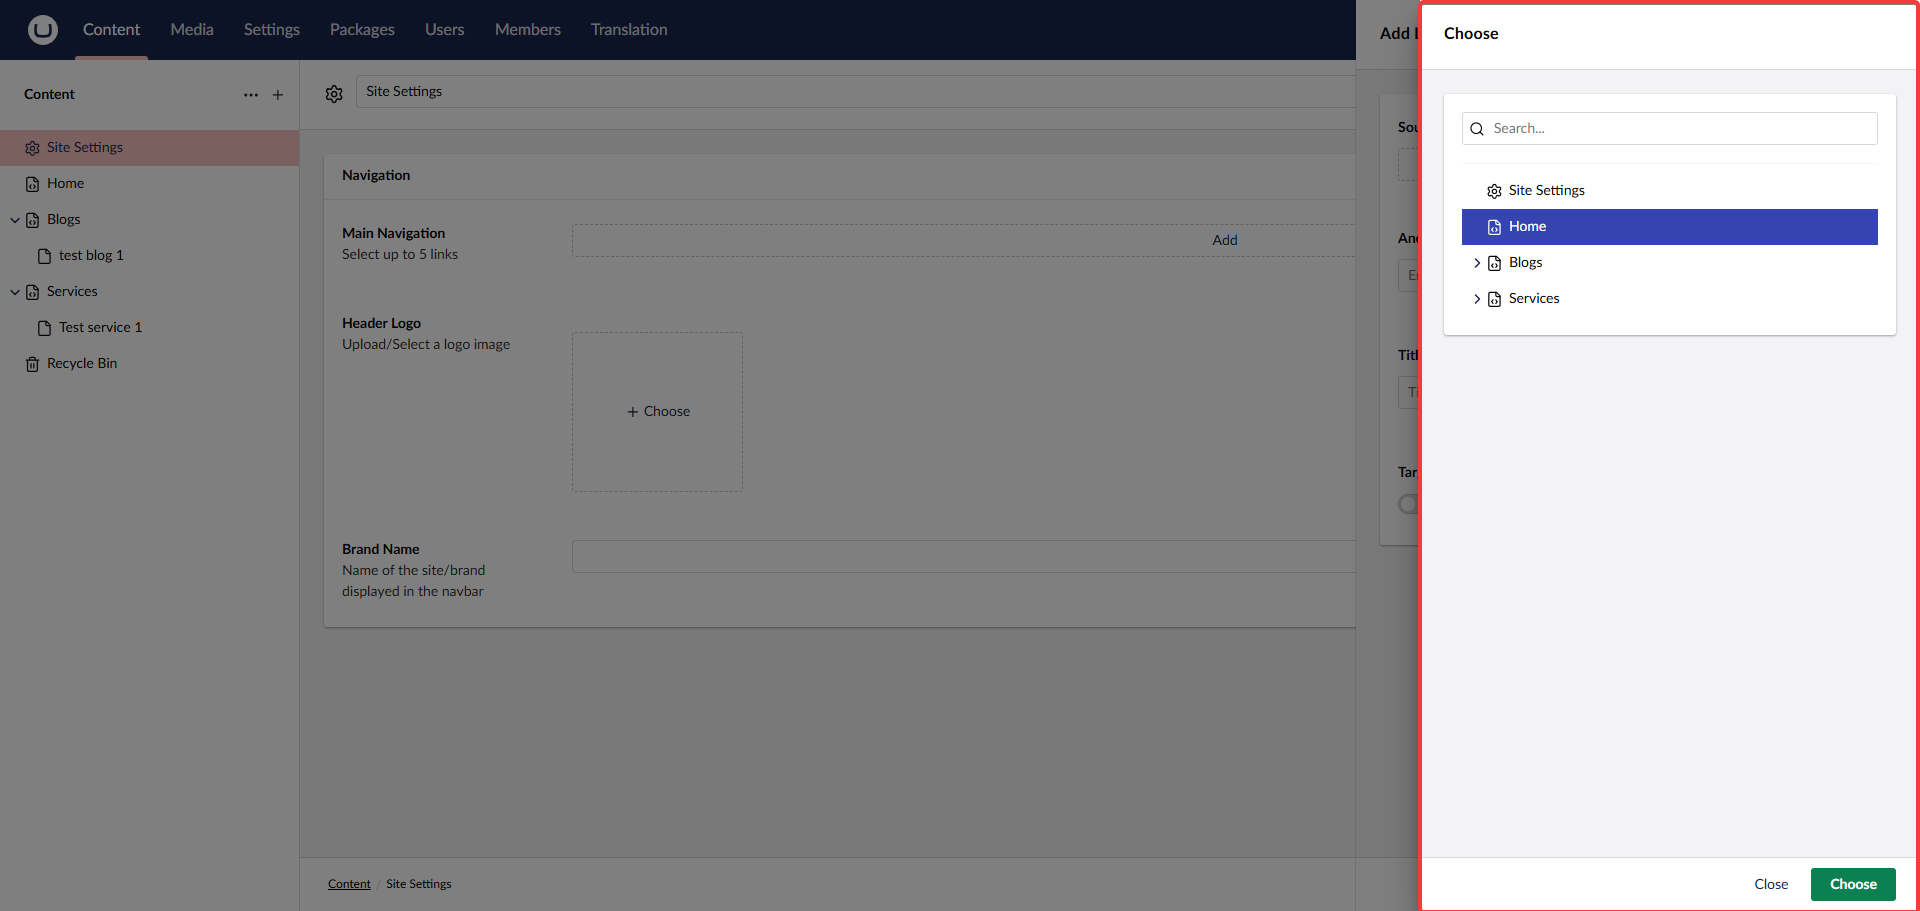
Select Add and choose the content options.
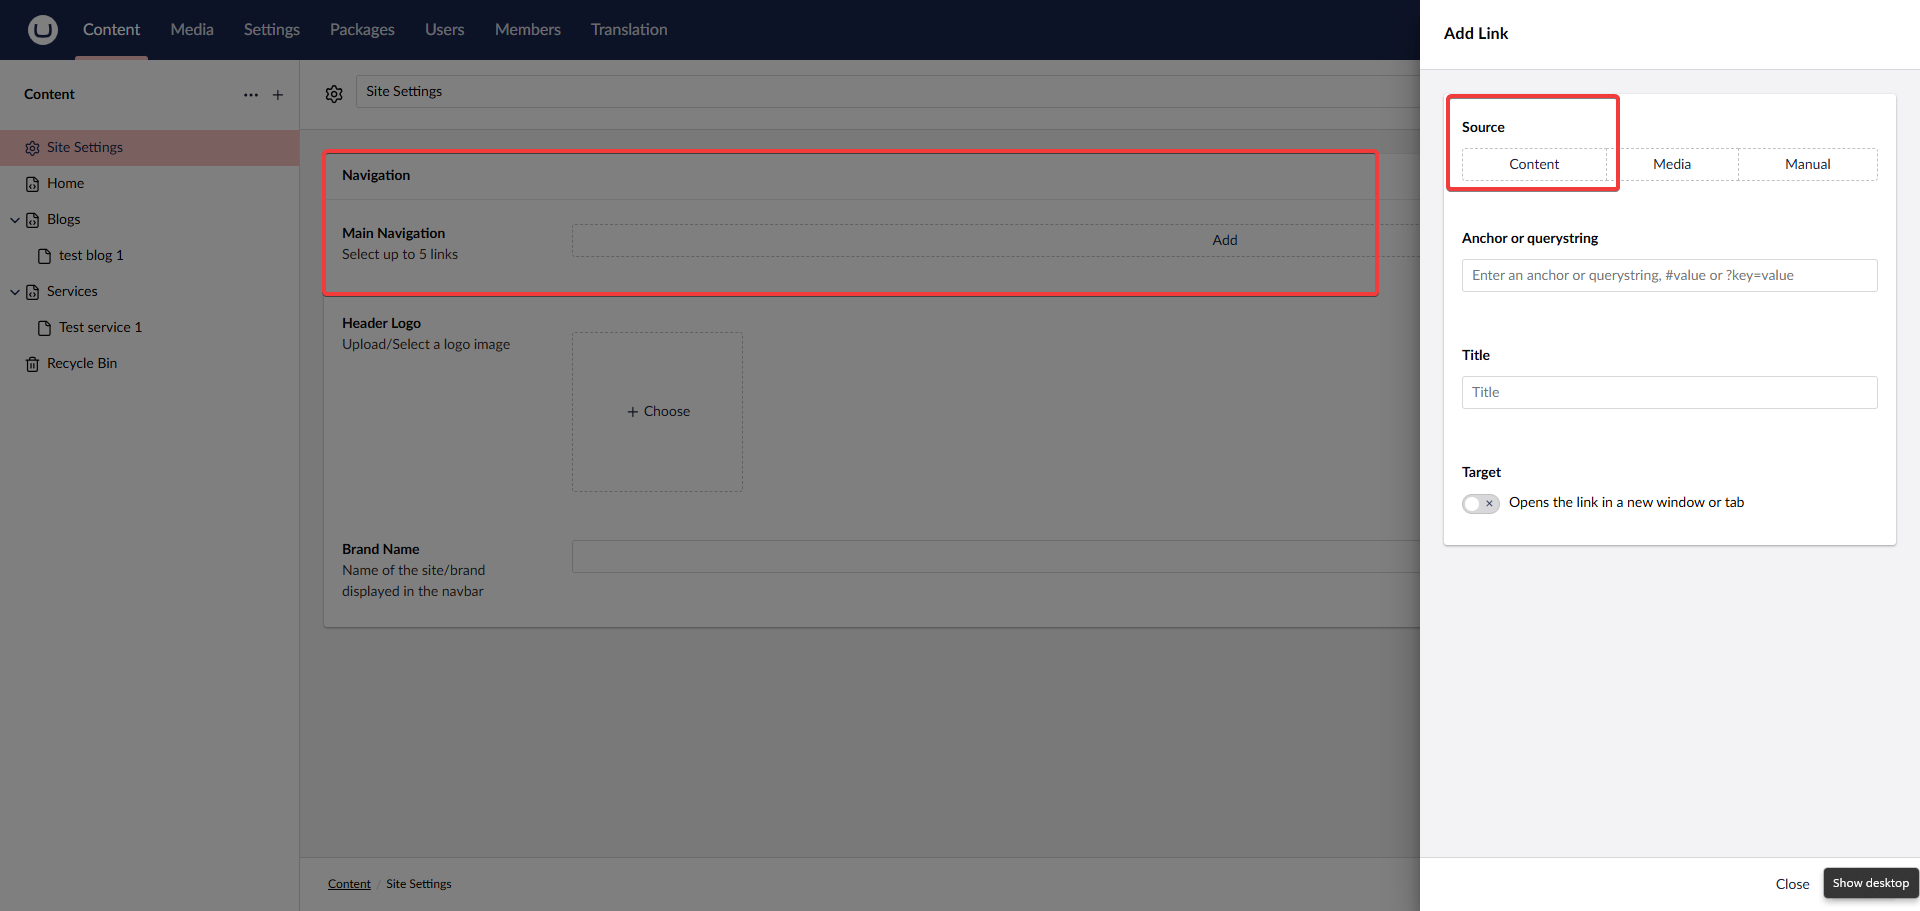
Step 13
Currently, you can select only one content item at a time.
Step 14
The final structure should look like this:
Troubleshooting
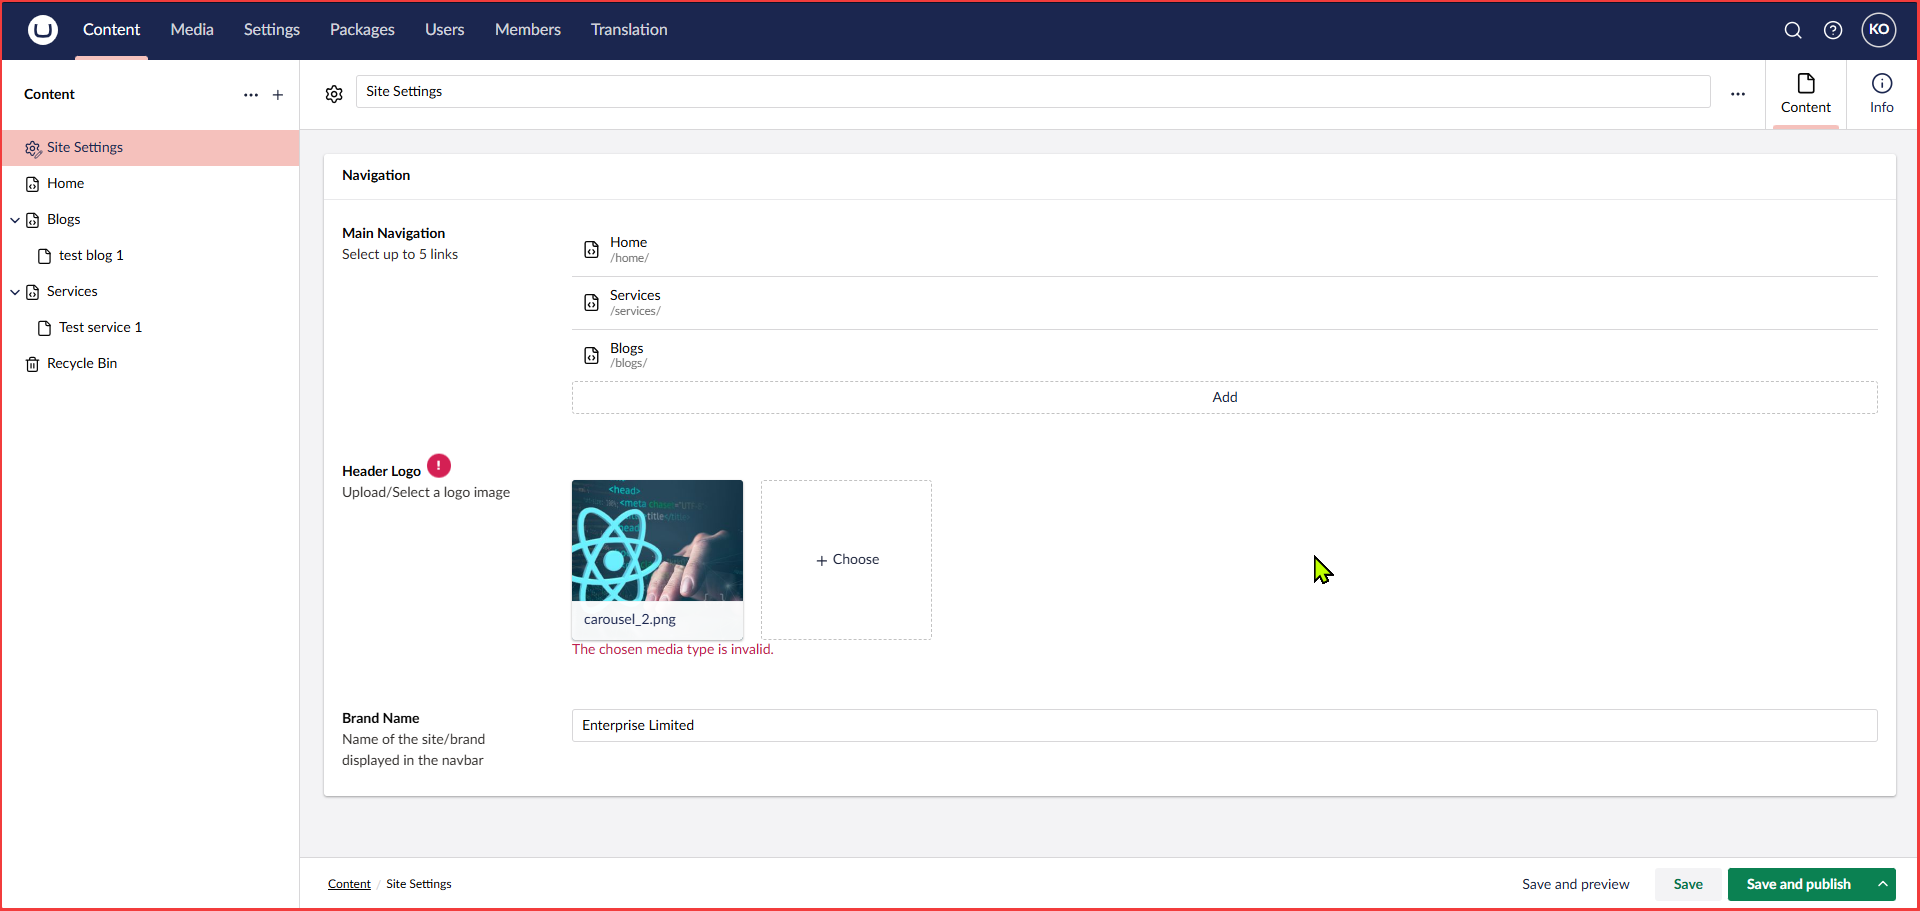
If you encounter the error: "The chosen media type is not valid", follow these steps:
Go to Settings > Data Types and select the property editor used for the Logo.
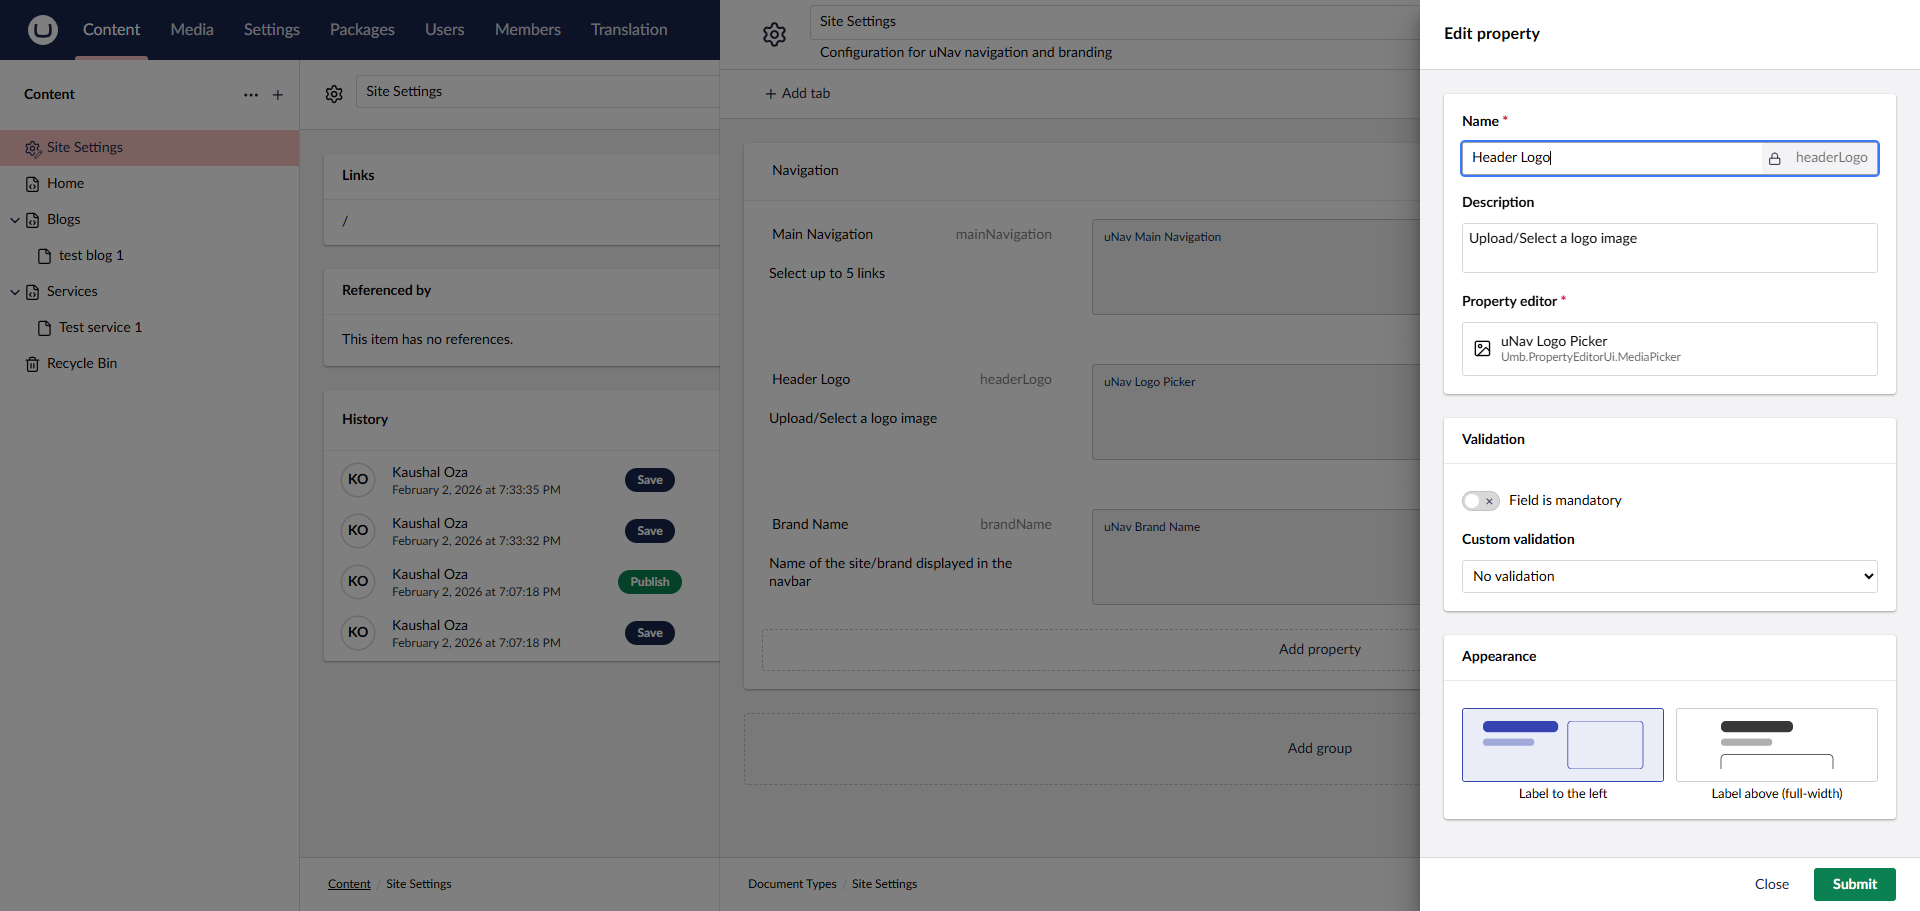
Remove the default media type filter.
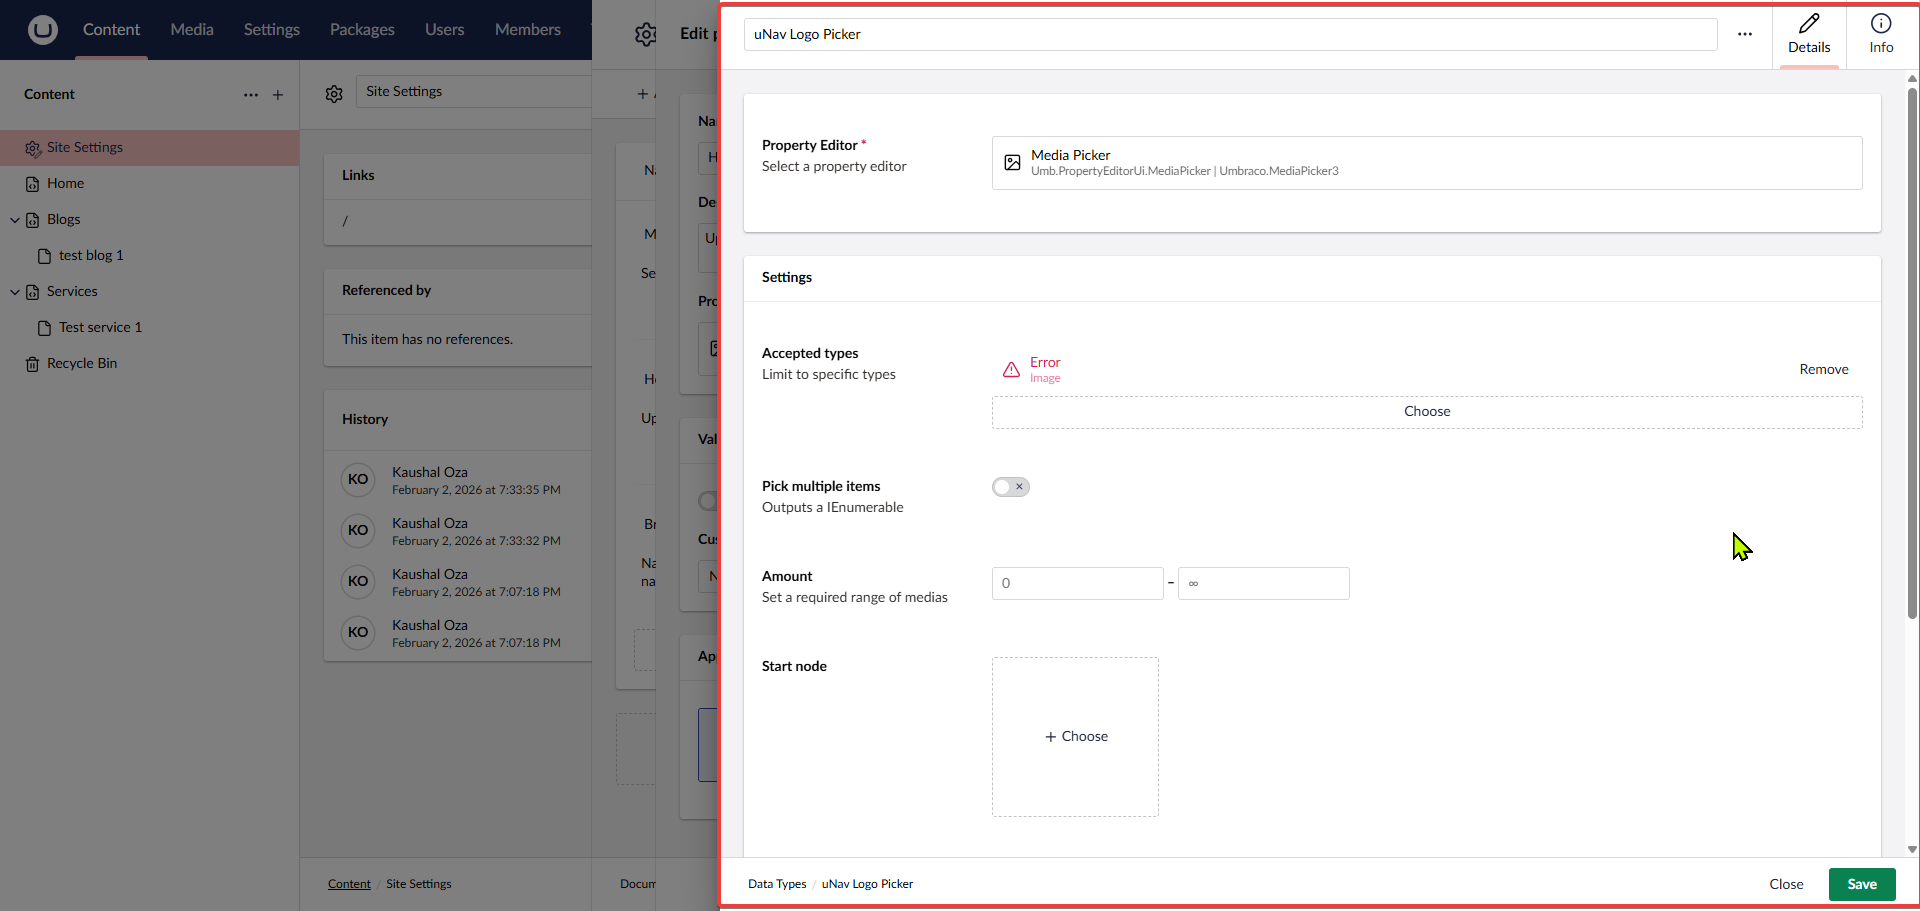
Choose Image as the allowed type.
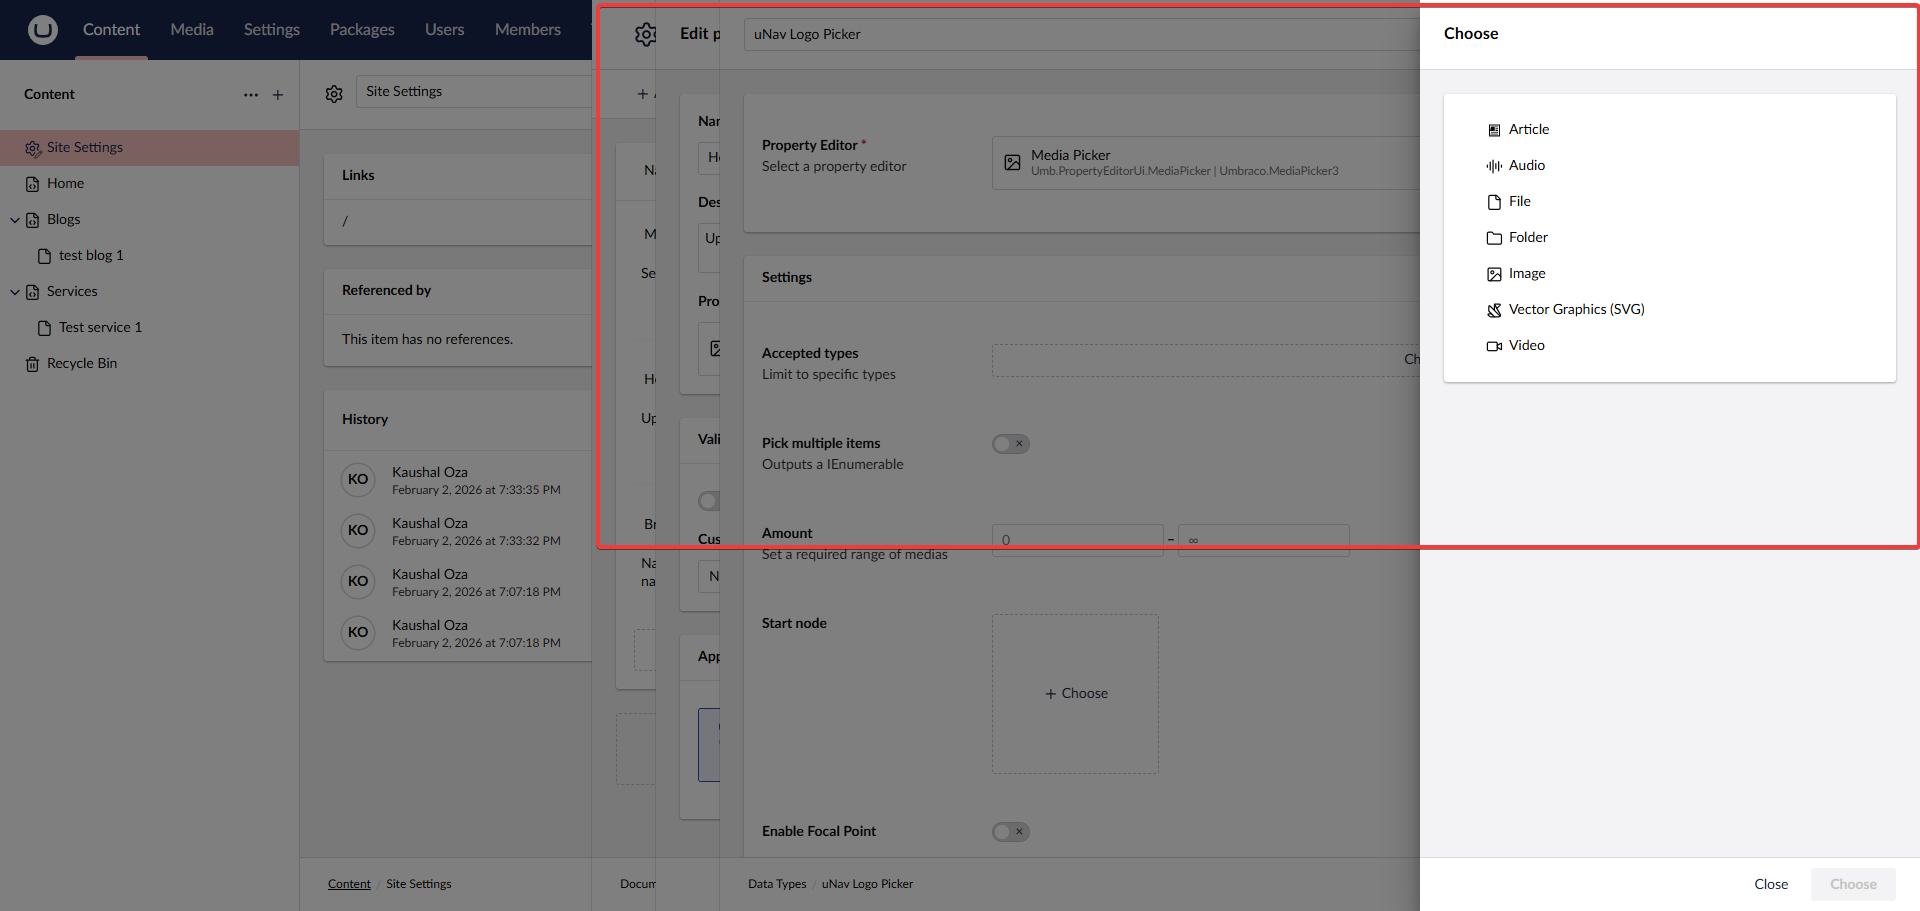
Publish the document again, and it should work.
Final Setup
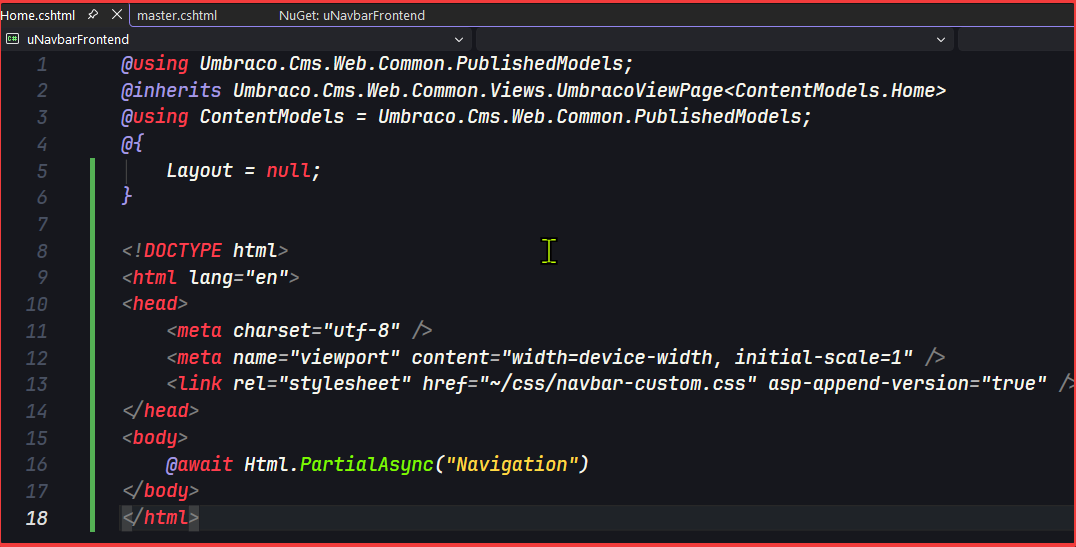
Register the CSS and partial view as shown in the "Usage" section of this README.
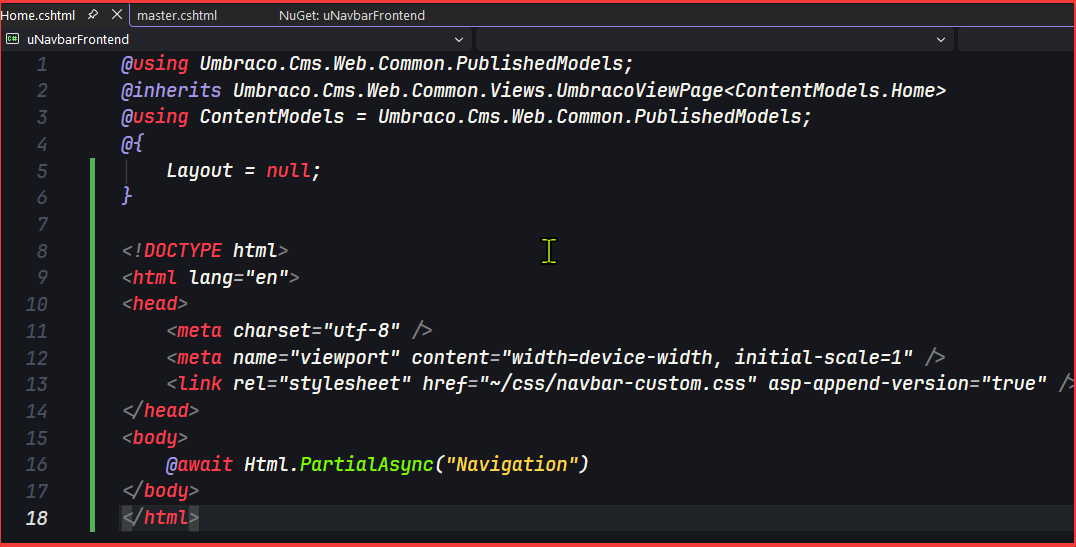
You will now see the navigation bar. You can always customize the CSS to fit your needs.
🤝 Support
For support, feature requests, or bug reports:
- Website: https://www.atharvaits.com
- Email: contact@atharvaits.com
- Company: Atharva IT Services Pvt. Ltd.
📄 License
Copyright © Atharva IT Services Pvt. Ltd.
This package is free to use for the Umbraco community.
🏢 About Atharva IT Services
Atharva IT Services Pvt. Ltd. a global software development company in Ahmedabad, excels in e-commerce solutions, web development, and software testing.
Made with ❤️ by Atharva IT Services
| Product | Versions Compatible and additional computed target framework versions. |
|---|---|
| .NET | net10.0 is compatible. net10.0-android was computed. net10.0-browser was computed. net10.0-ios was computed. net10.0-maccatalyst was computed. net10.0-macos was computed. net10.0-tvos was computed. net10.0-windows was computed. |
-
net10.0
- Umbraco.Cms.Infrastructure (>= 17.1.0)
- Umbraco.Cms.Web.Common (>= 17.1.0)
- Umbraco.Cms.Web.Website (>= 17.1.0)
NuGet packages
This package is not used by any NuGet packages.
GitHub repositories
This package is not used by any popular GitHub repositories.