AbpRadzen.DataDictionary.EntityFrameworkCore
1.0.0
dotnet add package AbpRadzen.DataDictionary.EntityFrameworkCore --version 1.0.0
NuGet\Install-Package AbpRadzen.DataDictionary.EntityFrameworkCore -Version 1.0.0
<PackageReference Include="AbpRadzen.DataDictionary.EntityFrameworkCore" Version="1.0.0" />
<PackageVersion Include="AbpRadzen.DataDictionary.EntityFrameworkCore" Version="1.0.0" />
<PackageReference Include="AbpRadzen.DataDictionary.EntityFrameworkCore" />
paket add AbpRadzen.DataDictionary.EntityFrameworkCore --version 1.0.0
#r "nuget: AbpRadzen.DataDictionary.EntityFrameworkCore, 1.0.0"
#:package AbpRadzen.DataDictionary.EntityFrameworkCore@1.0.0
#addin nuget:?package=AbpRadzen.DataDictionary.EntityFrameworkCore&version=1.0.0
#tool nuget:?package=AbpRadzen.DataDictionary.EntityFrameworkCore&version=1.0.0
<h1 align="center">Abp RadzenUI</h1>
<div align="center">
Abp RadzenUI is a Blazor Server UI theme built on top of the ABP framework and crafted with the Radzen Blazor component library.
![]()


</div>
English | 简体中文
Contents
❤️ Try the Demo
UserName: test
Password: 1q2w#E*
🌱 Get Started
Integration Steps
1. Create a new solution with the ABP CLI
abp new CRM -u blazor-server -dbms PostgreSQL -m none --theme leptonx-lite -csf
2. Install AbpRadzen.Blazor.Server.UI in your CRM.Blazor project
dotnet add package AbpRadzen.Blazor.Server.UI
3. Remove the NuGet packages and code related to the leptonx-lite theme
In practice, this mainly means cleaning up the code in CRMBlazorModule and removing the default Razor pages under the Pages directory.
4. Configure Abp RadzenUI
Add a ConfigureAbpRadzenUI method inside your ConfigService method:
private void ConfigureAbpRadzenUI()
{
    // Configure AbpRadzenUI
    Configure<AbpRadzenUIOptions>(options =>
    {
        // This is important. It registers the Razor pages from your current web application
        // so that they can be discovered by the router inside the AbpRadzenUI module.
        options.RouterAdditionalAssemblies = [typeof(Home).Assembly];

        // Other optional settings
        //options.TitleBar = new TitleBarSettings
        //{
        //    ShowLanguageMenu = false,
        //    Title = "CRM",
        //    ShowBreadcrumb = true, // Show breadcrumb navigation in the title bar (default: true)
        //};
        //options.LoginPage = new LoginPageSettings
        //{
        //    LogoPath = "xxx/xx.png"
        //};
        //options.Theme = new ThemeSettings
        //{
        //    Default = "material",
        //    EnablePremiumTheme = true,
        //};

        // Configure the icon for external login providers
        options.ExternalLogin.Providers.Add(new ExternalLoginProvider("AzureOpenId", "images/microsoft-logo.svg"));
    });

    // Configure AbpMultiTenancyOptions. This controls whether tenant switching
    // is shown on the login page.
    Configure<AbpMultiTenancyOptions>(options =>
    {
        options.IsEnabled = MultiTenancyConsts.IsEnabled;
    });

    // Configure AbpLocalizationOptions
    Configure<AbpLocalizationOptions>(options =>
    {
        // Inherit from AbpRadzenUIResource so your application can reuse
        // the built-in localization texts provided by this UI package.
        var crmResource = options.Resources.Get<CRMResource>();
        crmResource.AddBaseTypes(typeof(AbpRadzenUIResource));

        // If you prefer a custom language list, clear the default set and add your own.
        options.Languages.Clear();
        options.Languages.Add(new LanguageInfo("en", "en", "English"));
        options.Languages.Add(new LanguageInfo("fr", "fr", "Français"));
        options.Languages.Add(new LanguageInfo("zh-Hans", "zh-Hans", "简体中文"));
    });

    // Configure your application's navigation menu
    Configure<AbpNavigationOptions>(options =>
    {
        options.MenuContributors.Add(new CRMMenuContributor());
    });
}
Then add the following line at the end of your OnApplicationInitialization method:
app.UseRadzenUI();
For a complete example, refer to CRMBlazorWebModule.
5. Configure the menu
Whenever you add a new Razor page and want it to appear in the sidebar, update the CRMMenuContributor class accordingly.
6. Configure external login
If you want to integrate a third-party identity provider such as Azure AD, the setup is straightforward. Add the following configuration to your settings file, then register the authentication handler in your web module. You can also refer to the sample project for a working implementation.
"AzureAd": {
  "Instance": "https://login.microsoftonline.com/",
  "TenantId": "<your-tenant-id>",
  "ClientId": "<your-client-id>",
  "ClientSecret": "<your-client-secret>",
  "CallbackPath": "/signin-azuread-oidc"
}
private void ConfigureOidcAuthentication(
    ServiceConfigurationContext context,
    IConfiguration configuration
)
{
    if (configuration.GetSection("AzureAd").Exists())
    {
        context
            .Services.AddAuthentication()
            .AddOpenIdConnect(
                "AzureOpenId",
                "Azure Active Directory",
                options =>
                {
                    options.Authority =
                        $"{configuration["AzureAd:Instance"]}{configuration["AzureAd:TenantId"]}/v2.0/";
                    options.ClientId = configuration["AzureAd:ClientId"];
                    options.ClientSecret = configuration["AzureAd:ClientSecret"];
                    options.ResponseType = OpenIdConnectResponseType.Code;
                    options.CallbackPath = configuration["AzureAd:CallbackPath"];
                    options.RequireHttpsMetadata = false;
                    options.SaveTokens = true;
                    options.GetClaimsFromUserInfoEndpoint = true;
                    options.SignInScheme = IdentityConstants.ExternalScheme;

                    options.Scope.Add("email");
                }
            );
    }
}
7. Configure the settings page
In real-world projects, it is common to manage system-level or business-level settings such as email providers, SMS providers, and similar options. ABP provides a convenient Settings infrastructure for persisting and retrieving these values. Based on that mechanism, this UI package makes it easy to surface configuration components as tabs on a unified settings page.
Follow the steps below to add your own settings component:
(1) Create an application service for your settings, for example: AccountSettingsAppService
(2) Create a Blazor component for the settings UI, for example: AccountSettingComponent
(3) Create a contributor by implementing ISettingComponentContributor. The contributor is responsible for registering your settings component, for example: AccountPageContributor
(4) Finally, register the contributor in your module configuration
Configure<SettingManagementComponentOptions>(options =>
{
    options.Contributors.Add(new EmailingPageContributor());
    options.Contributors.Add(new TimeZonePageContributor());
    options.Contributors.Add(new AccountPageContributor());
});
8. Apply database migrations before the first run
📚 Use the Data Dictionary Module
The data dictionary module is included in the UI package and provides an out-of-the-box page for managing dictionary types and dictionary items.
Module Guide
1. Install the package
dotnet add package AbpRadzen.Blazor.Server.UI
If you only need the entity definitions and EF Core mappings, you can install the standalone package below:
dotnet add package AbpRadzen.DataDictionary.EntityFrameworkCore
2. Register the DbContext
The full UI module already registers DataDictionaryDbContext inside AbpRadzenUIModule. If you integrate only the EF Core package into your own solution, add the DbSets and call ConfigureDataDictionary() inside your application's DbContext.
public class MyProjectDbContext : AbpDbContext<MyProjectDbContext>
{
    public DbSet<DataDictionaryType> DataDictionaryTypes { get; set; }

    public DbSet<DataDictionaryItem> DataDictionaryItems { get; set; }

    protected override void OnModelCreating(ModelBuilder builder)
    {
        base.OnModelCreating(builder);

        builder.ConfigureDataDictionary();
    }
}
3. Add localization and menu support
The built-in page route is /data-dictionary. When you use the full UI package, menu contributions and localization resources are already wired up. If you are composing your own application module, make sure your localization resource inherits from AbpRadzenUIResource.
4. Apply database changes
The data dictionary module creates the following two tables:
DataDictionaryTypesDataDictionaryItems
After integrating the module, create and apply your EF Core migrations in the usual way.
5. Usage notes
- Dictionary items are associated with dictionary types through
DataDictionaryTypeId, but the EF Core mapping does not create a database-level foreign key. - Deleting a dictionary type will also remove its child dictionary items at the application-service level.
- The built-in page uses a master-detail DataGrid layout. Selecting a dictionary type automatically refreshes the item grid on the right.
🎨 Preview the Interface
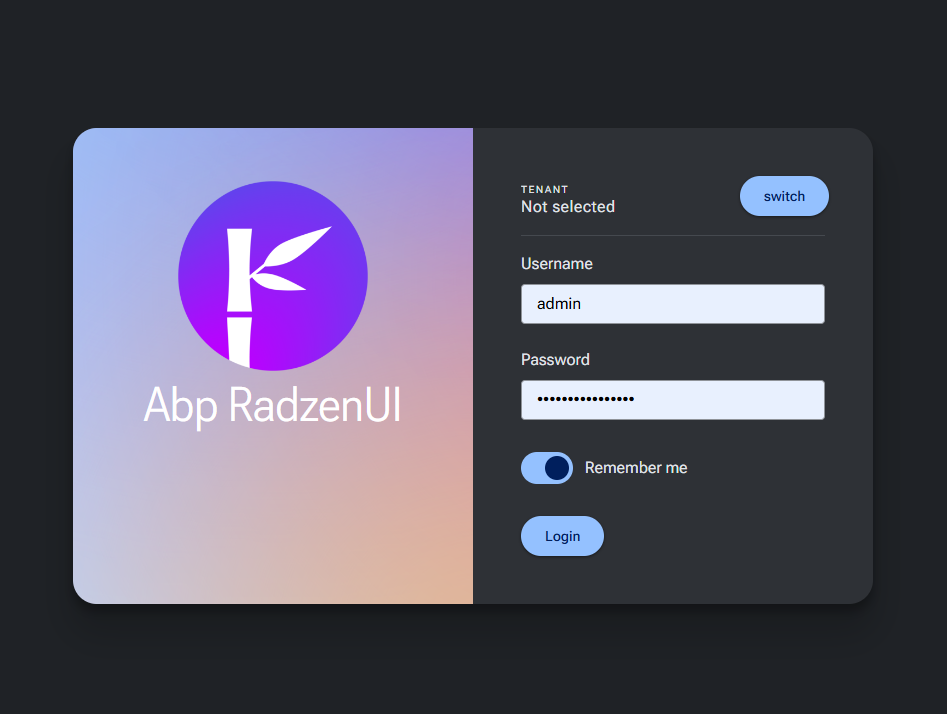
1. Login page
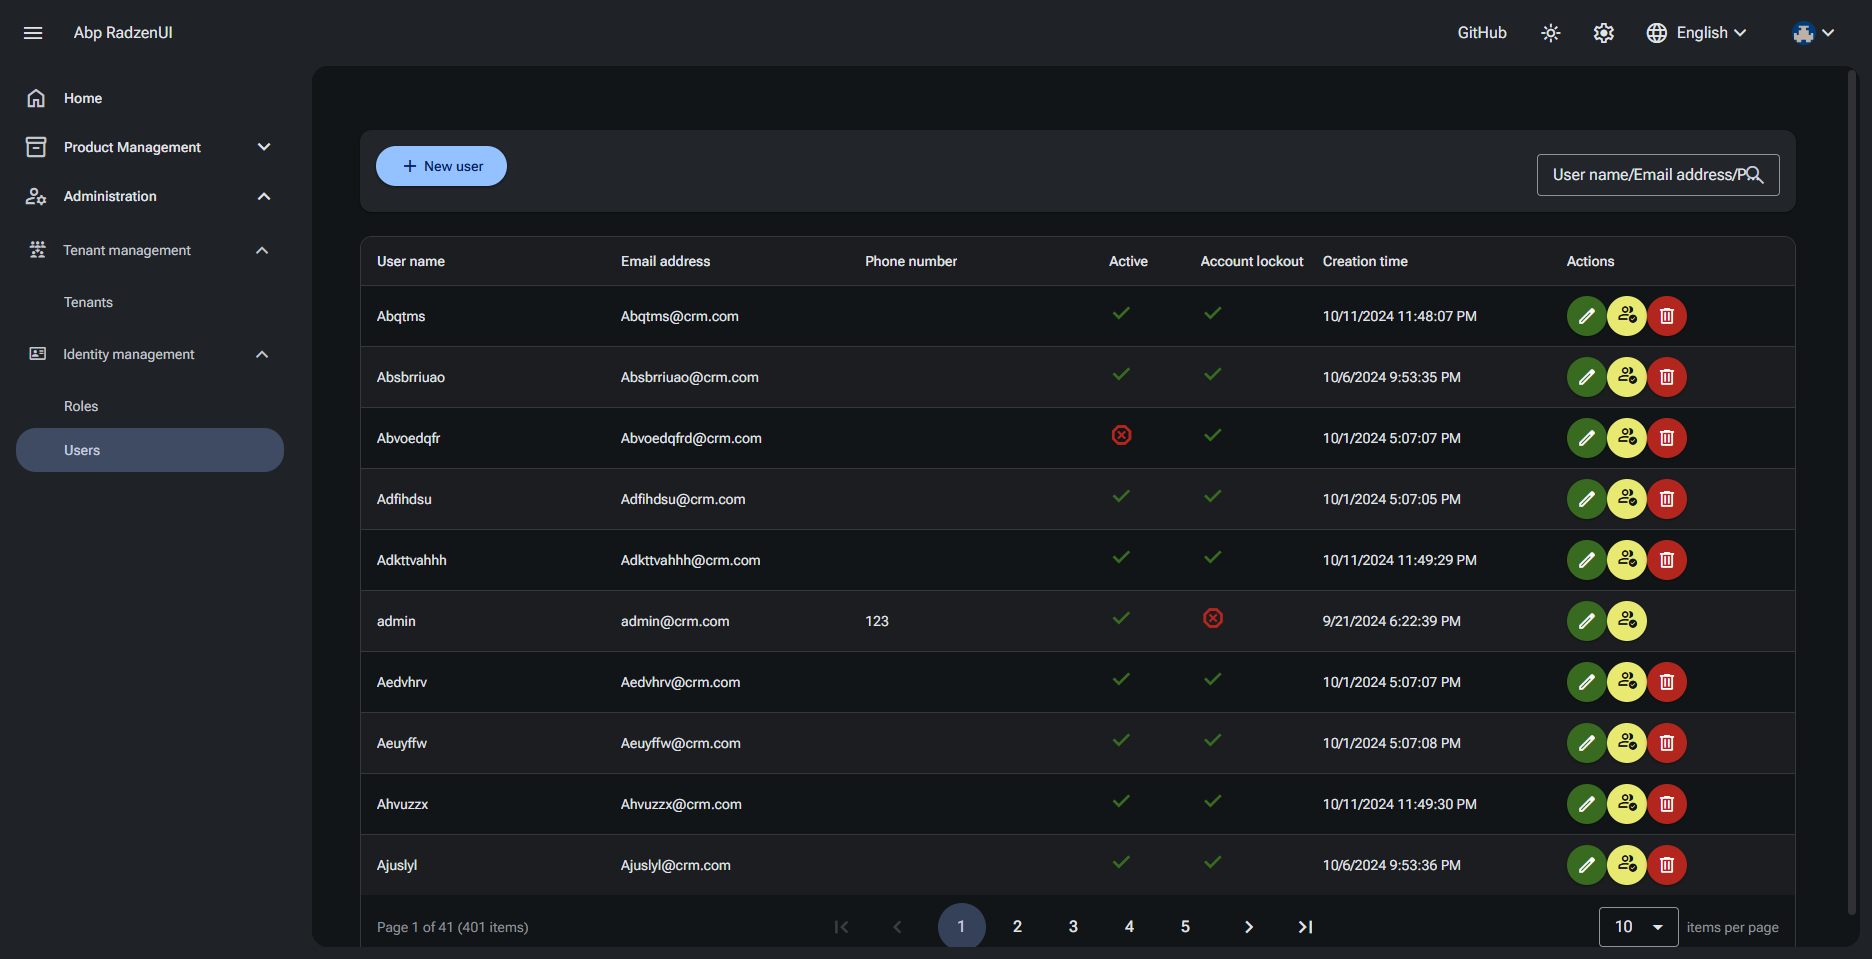
2. List page
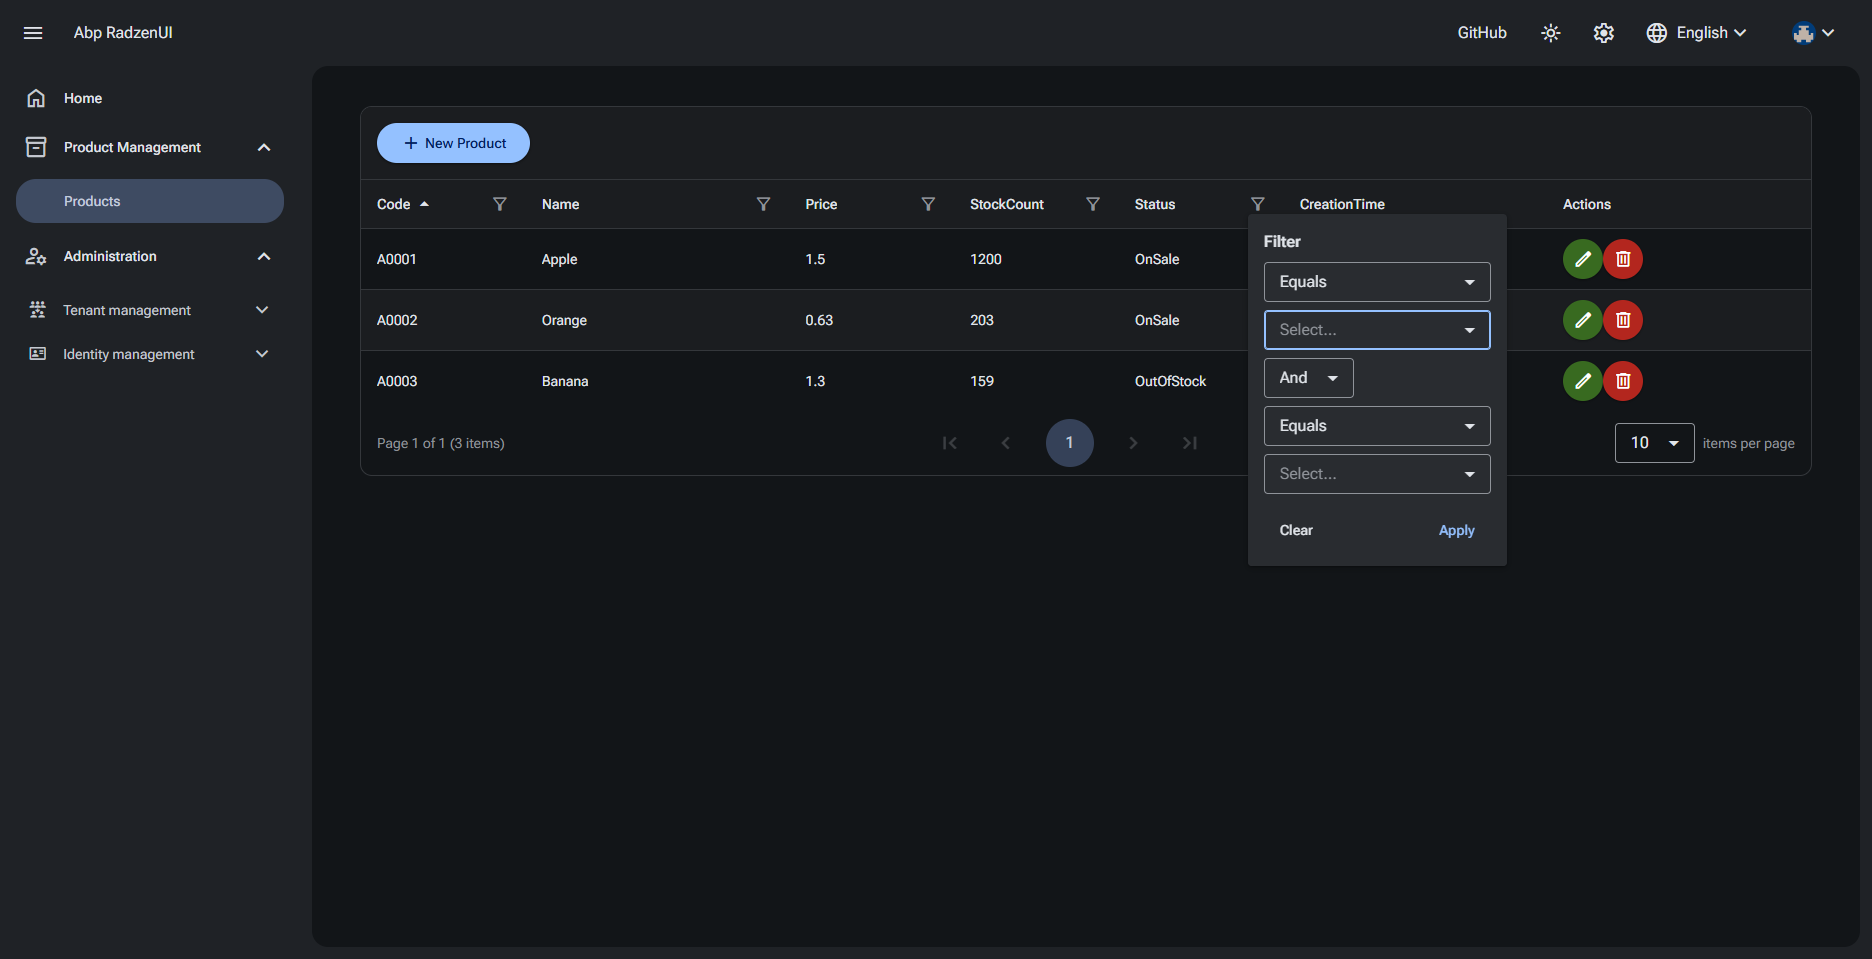
3. List page with DataGrid filters
4. Theme switching

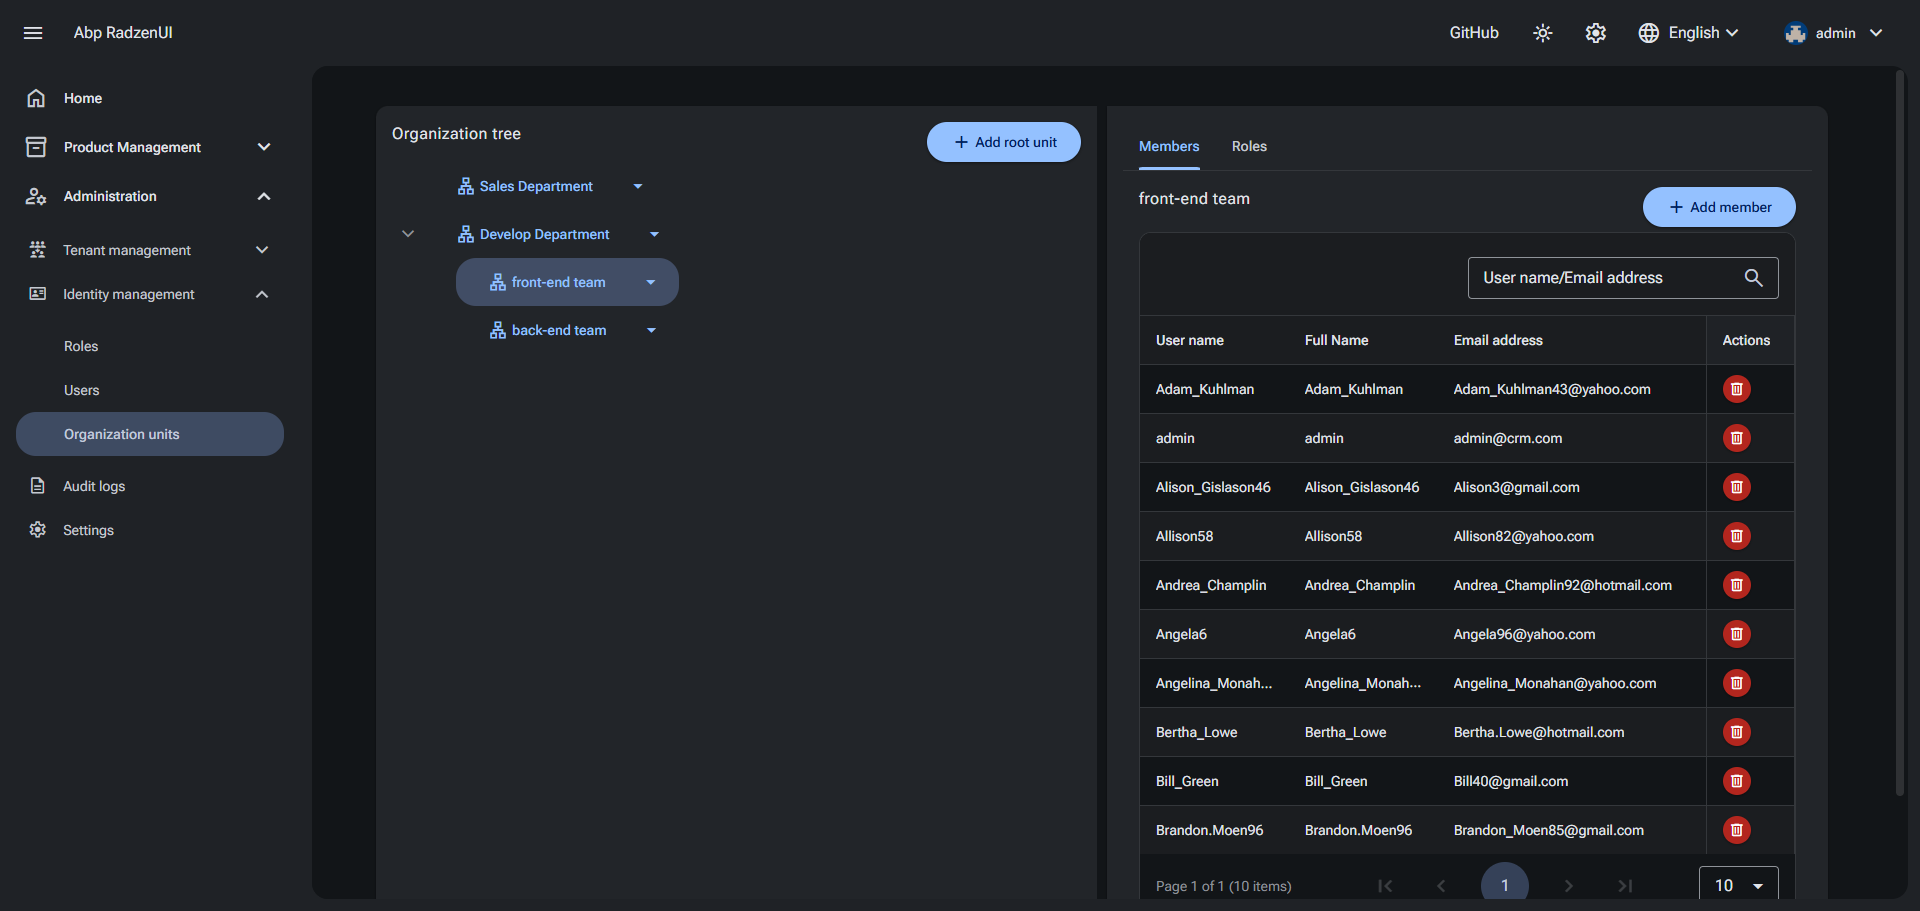
5. Organization units
| Product | Versions Compatible and additional computed target framework versions. |
|---|---|
| .NET | net10.0 is compatible. net10.0-android was computed. net10.0-browser was computed. net10.0-ios was computed. net10.0-maccatalyst was computed. net10.0-macos was computed. net10.0-tvos was computed. net10.0-windows was computed. |
-
net10.0
- Volo.Abp.EntityFrameworkCore (>= 10.2.0)
NuGet packages (1)
Showing the top 1 NuGet packages that depend on AbpRadzen.DataDictionary.EntityFrameworkCore:
| Package | Downloads |
|---|---|
|
AbpRadzen.Blazor.Server.UI
ABP framework theme developed using Radzen blazor components |
GitHub repositories
This package is not used by any popular GitHub repositories.